Prototype an Input Stepper with ProtoPie's Formula Feature
Learn how to easily prototype an input stepper with ProtoPie. We will walkthrough all of the elements, formulas, and conditions to make it happen.

Introduction
Input Steppers (Steppers) are a common design element that can make it easy for your users to incrementally increase or decrease a numeric value—they are most effective when you use them for input fields with small number variability. While also used across different types of other interfaces, like Voice or Gestural, this article covers a standard stepper type for a Graphical User Interface (GUI).
ProtoPie makes it easy to prototype a stepper interaction by allowing you to perform mathematical formulas directly on numbers without any extra effort. To give you a glimpse, this is one of two formula variations we will cover: number(Layer Name.text)+1
What you will learn
In this lesson, you'll implement:
- 'Make Editable' to a text layer
- A formula to increase numbers ( + )
- A formula to decrease numbers ( - )
- A conditional for an edge case
By the end of this walkthrough, you will have made this!
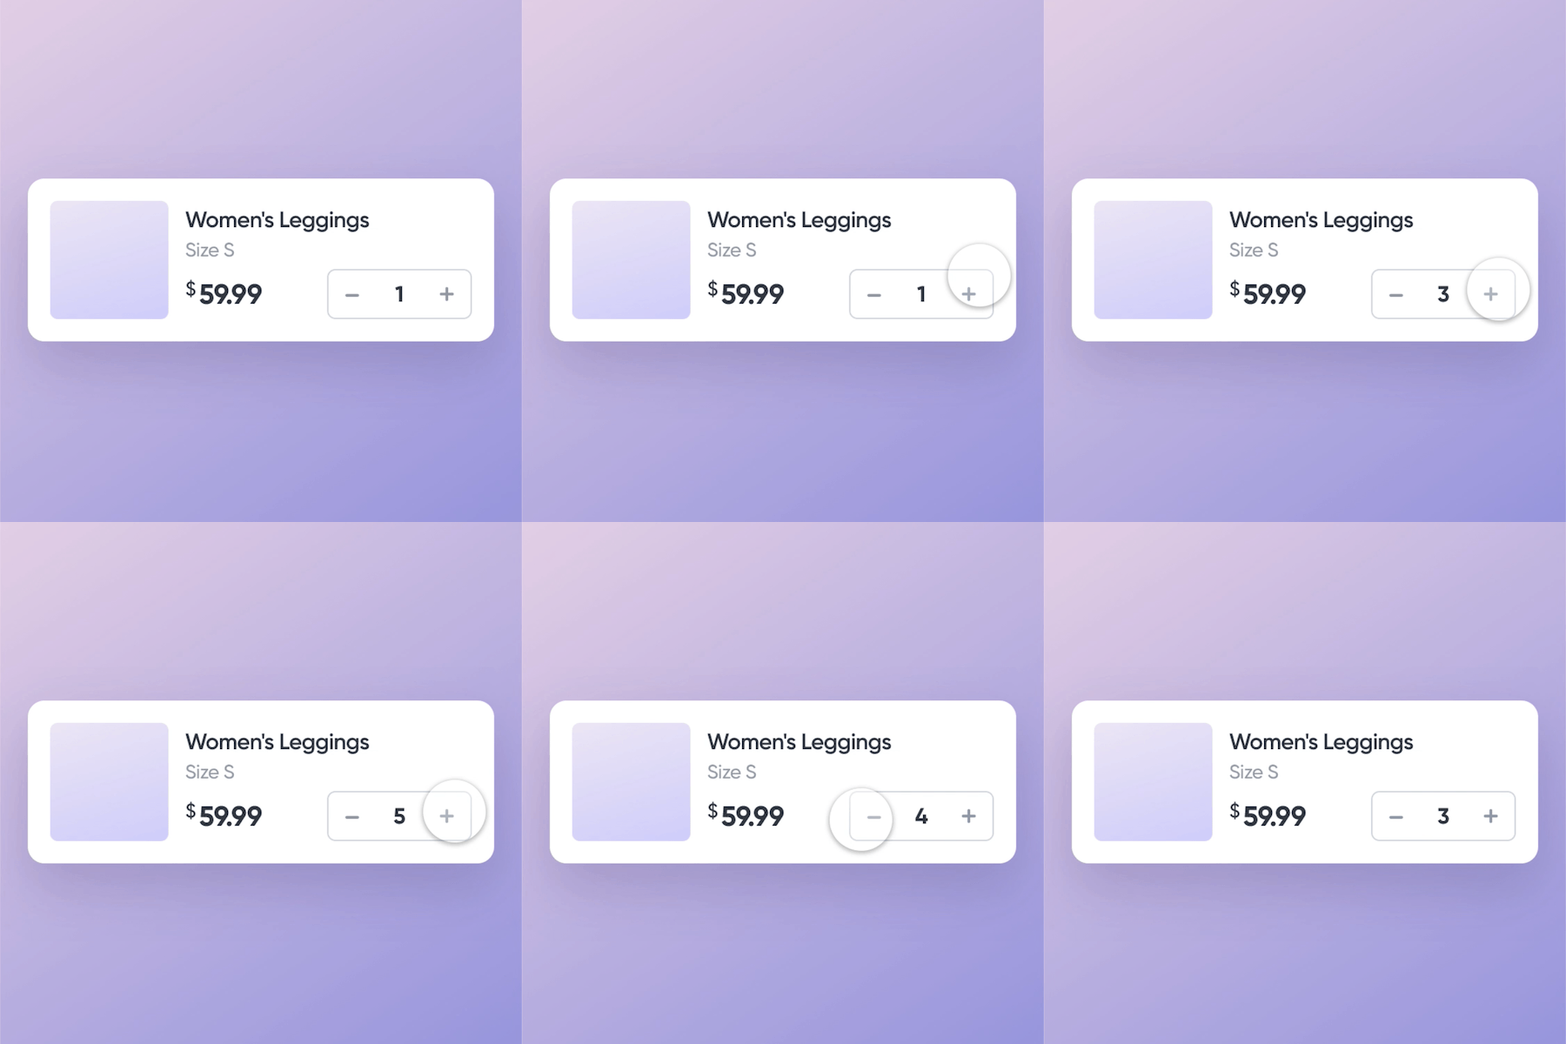.gif)
Step-By-Step Breakdown
1. 'Make Editable' to a text layer
- Select the text layer (Number) and click Make Editable in the property panel on the right side of the screen.
💡 When you import layers from another design program (e.g. Figma, Adobe XD, or Sketch), all layers are imported as objects. In order to edit those objects within ProtoPie, you need to change those objects into editable layers (i.e. changing imported Text Objects into editable Text Layers).

2. A formula to increase numbers ( + )
- Add a Tap trigger to the + group, and then add a Text response from the Number layer for this Tap trigger.
![GIF showing a [Text] response from the 'Number' layer as part of the new [Tap] trigger for the '+' button group.](https://cdn.sanity.io/images/qyzm5ged/production/d2051553be3355de5f97c723be8009f131878a74-2880x1750.gif/2-1.gif)
2. For the new Text response, change the to Formula instead of Text in the content section.
![GIF showing a [Text] response's content changing from [text] to [formula]](https://cdn.sanity.io/images/qyzm5ged/production/9166c1cc677bfbd9ef4dad3a88b3a4d84bff07cd-1050x435.gif/2-2.gif)
3. Click on the fx button. This will bring up the formula bar and allow you to input the following: number('Number'.text)+1 This is an in-house conversion function that tells ProtoPie to read the Number text as a number. This allows ProtoPie to perform math on the text directly.
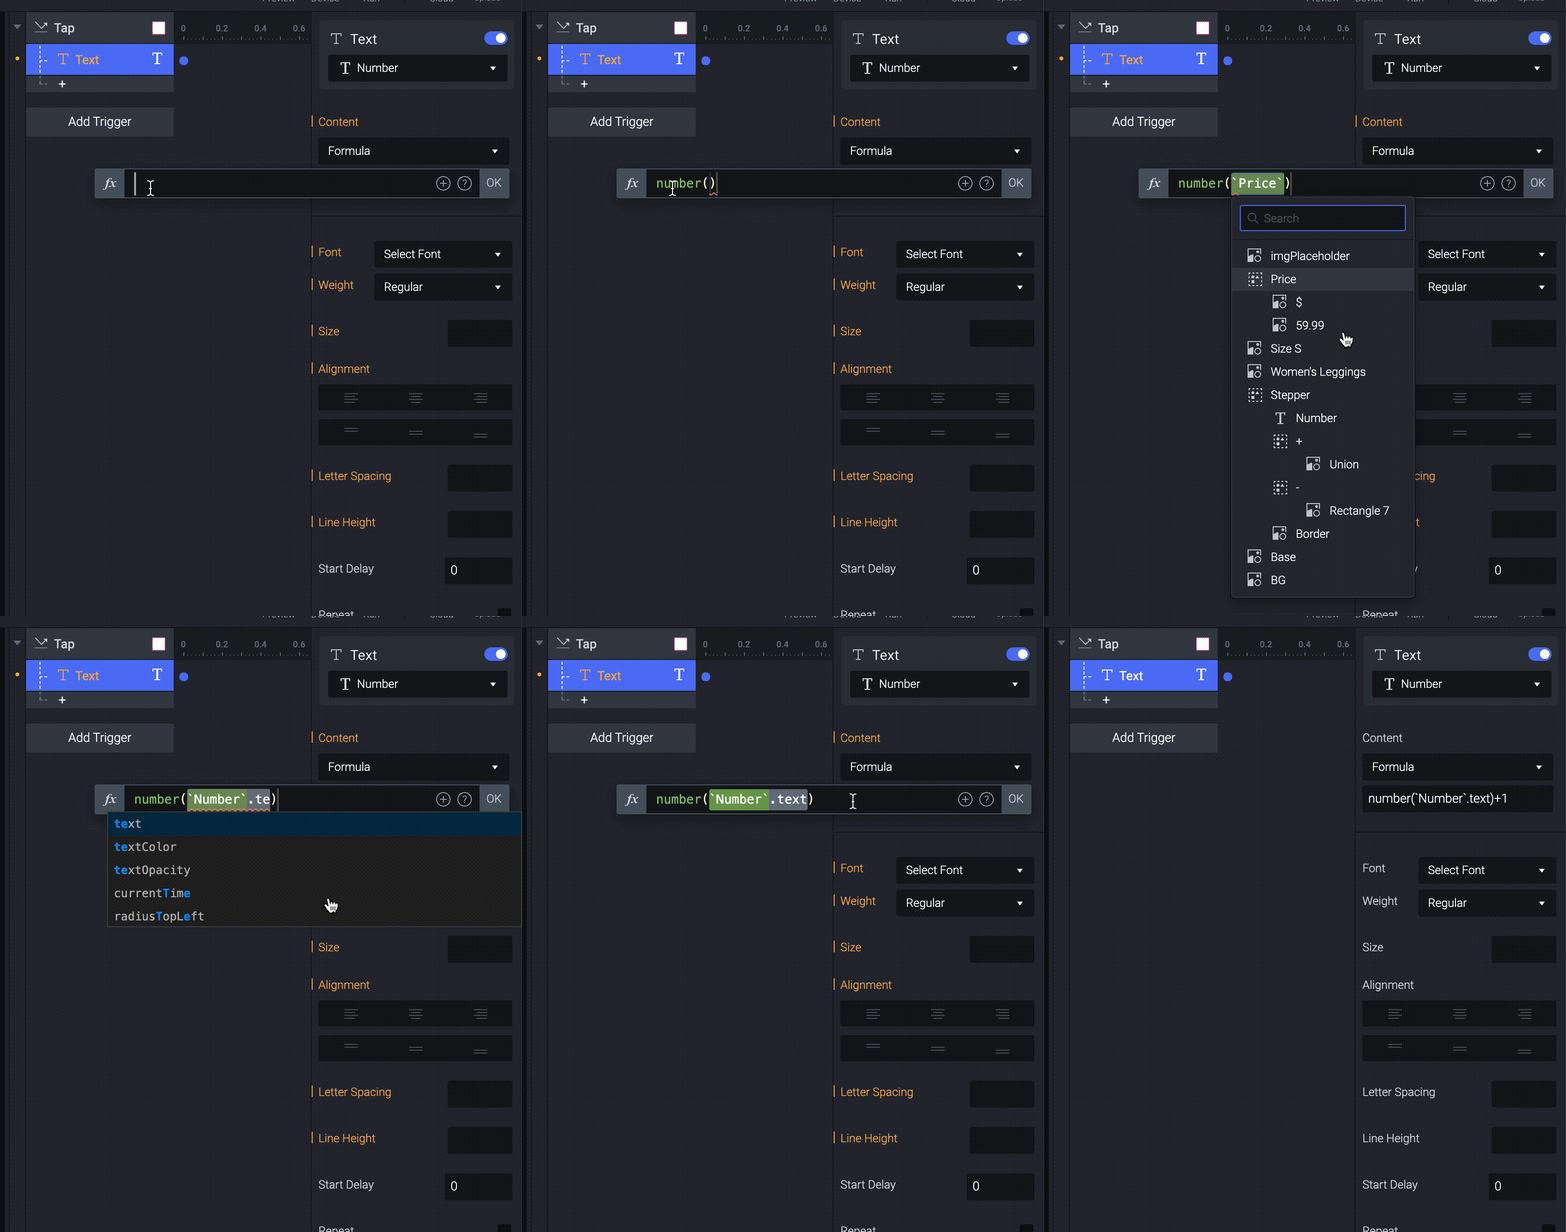
Try out your prototype now, and you should see the number increase by 1 every time you tap on the + button, but the - button is still inactive. We will use what we know now to enable the - button's interaction.
3. A formula to decrease numbers ( - )
- Similar to the first steps of the previous section, create a [Tap] trigger for the '-' group with a [Text], [formula] response from the 'Number' layer.
![GIF showing a similar [Tap] trigger and [Text] response setup for the '-' group.](https://cdn.sanity.io/images/qyzm5ged/production/deabb0739b9f070618201563c954e0851701b243-2880x1750.gif/3-1.gif)
2. Since we want the number to decrease every time the - button group is tapped, the formula we will use this time is: number('Number'.text)-1
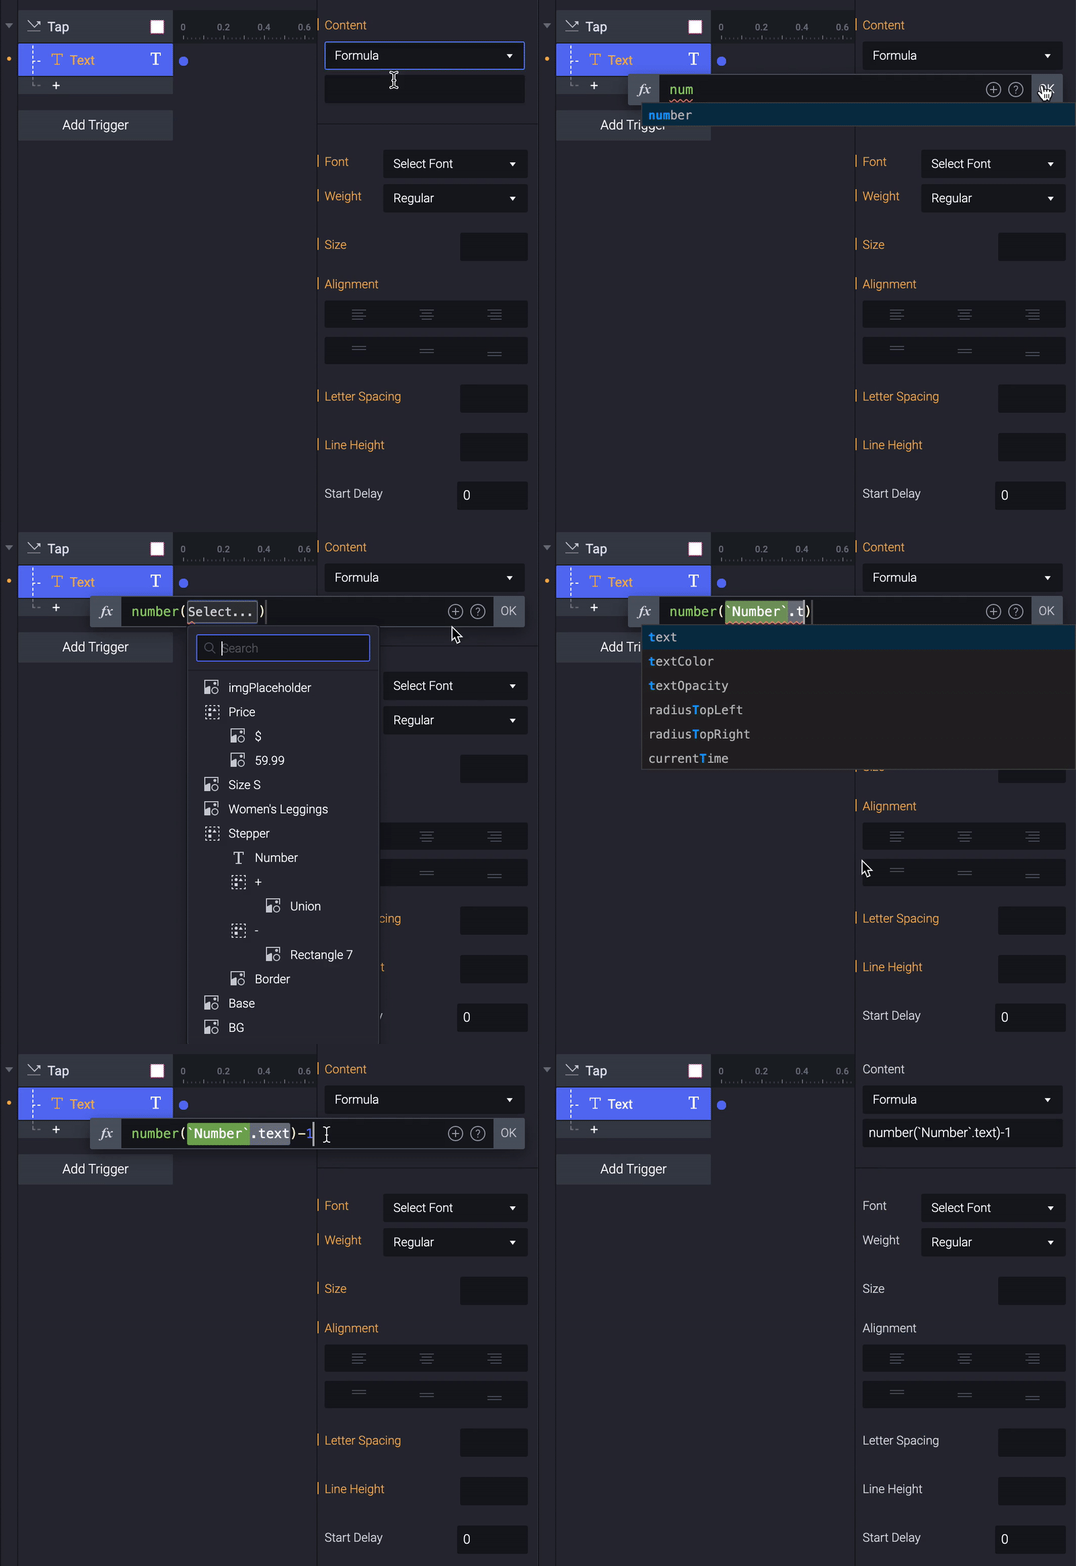
Try out your prototype now and both the + and - buttons should increase or decrease the number value respectively. You will also notice that the stepper could go into the negative values. We can use a conditional to prevent users from inputting a negative value.
4. A conditional for an edge case
ProtoPie's conditionals feature can help you test your method for preventing edge cases like negative numbers. Conditionals are recognized as high-priority items and will be checked for by ProtoPie before executing any other response.
In this case, when a user clicks on the - button group while the text is 0, it will skip over the original decreasing formula we assigned to it, and execute the actions that respond to the 0 condition.
- In the Tap trigger for the - group, add this condition to the Number layer:
Text of 'Number' = 0 - Add a Text response from the Number layer under this condition. The response content should be set to Text and fill it in with a 0.
![GIF showing the setup for a "0" value condition where the 'Number' layer would respond by setting [Text] to 0.](https://cdn.sanity.io/images/qyzm5ged/production/6eb3385d3e78133657b969bac9af5d81103d7136-1112x1286.gif/3-3.gif)
Once the text value of Number reaches 0, the prototype will not decrease further.
And you're finished!
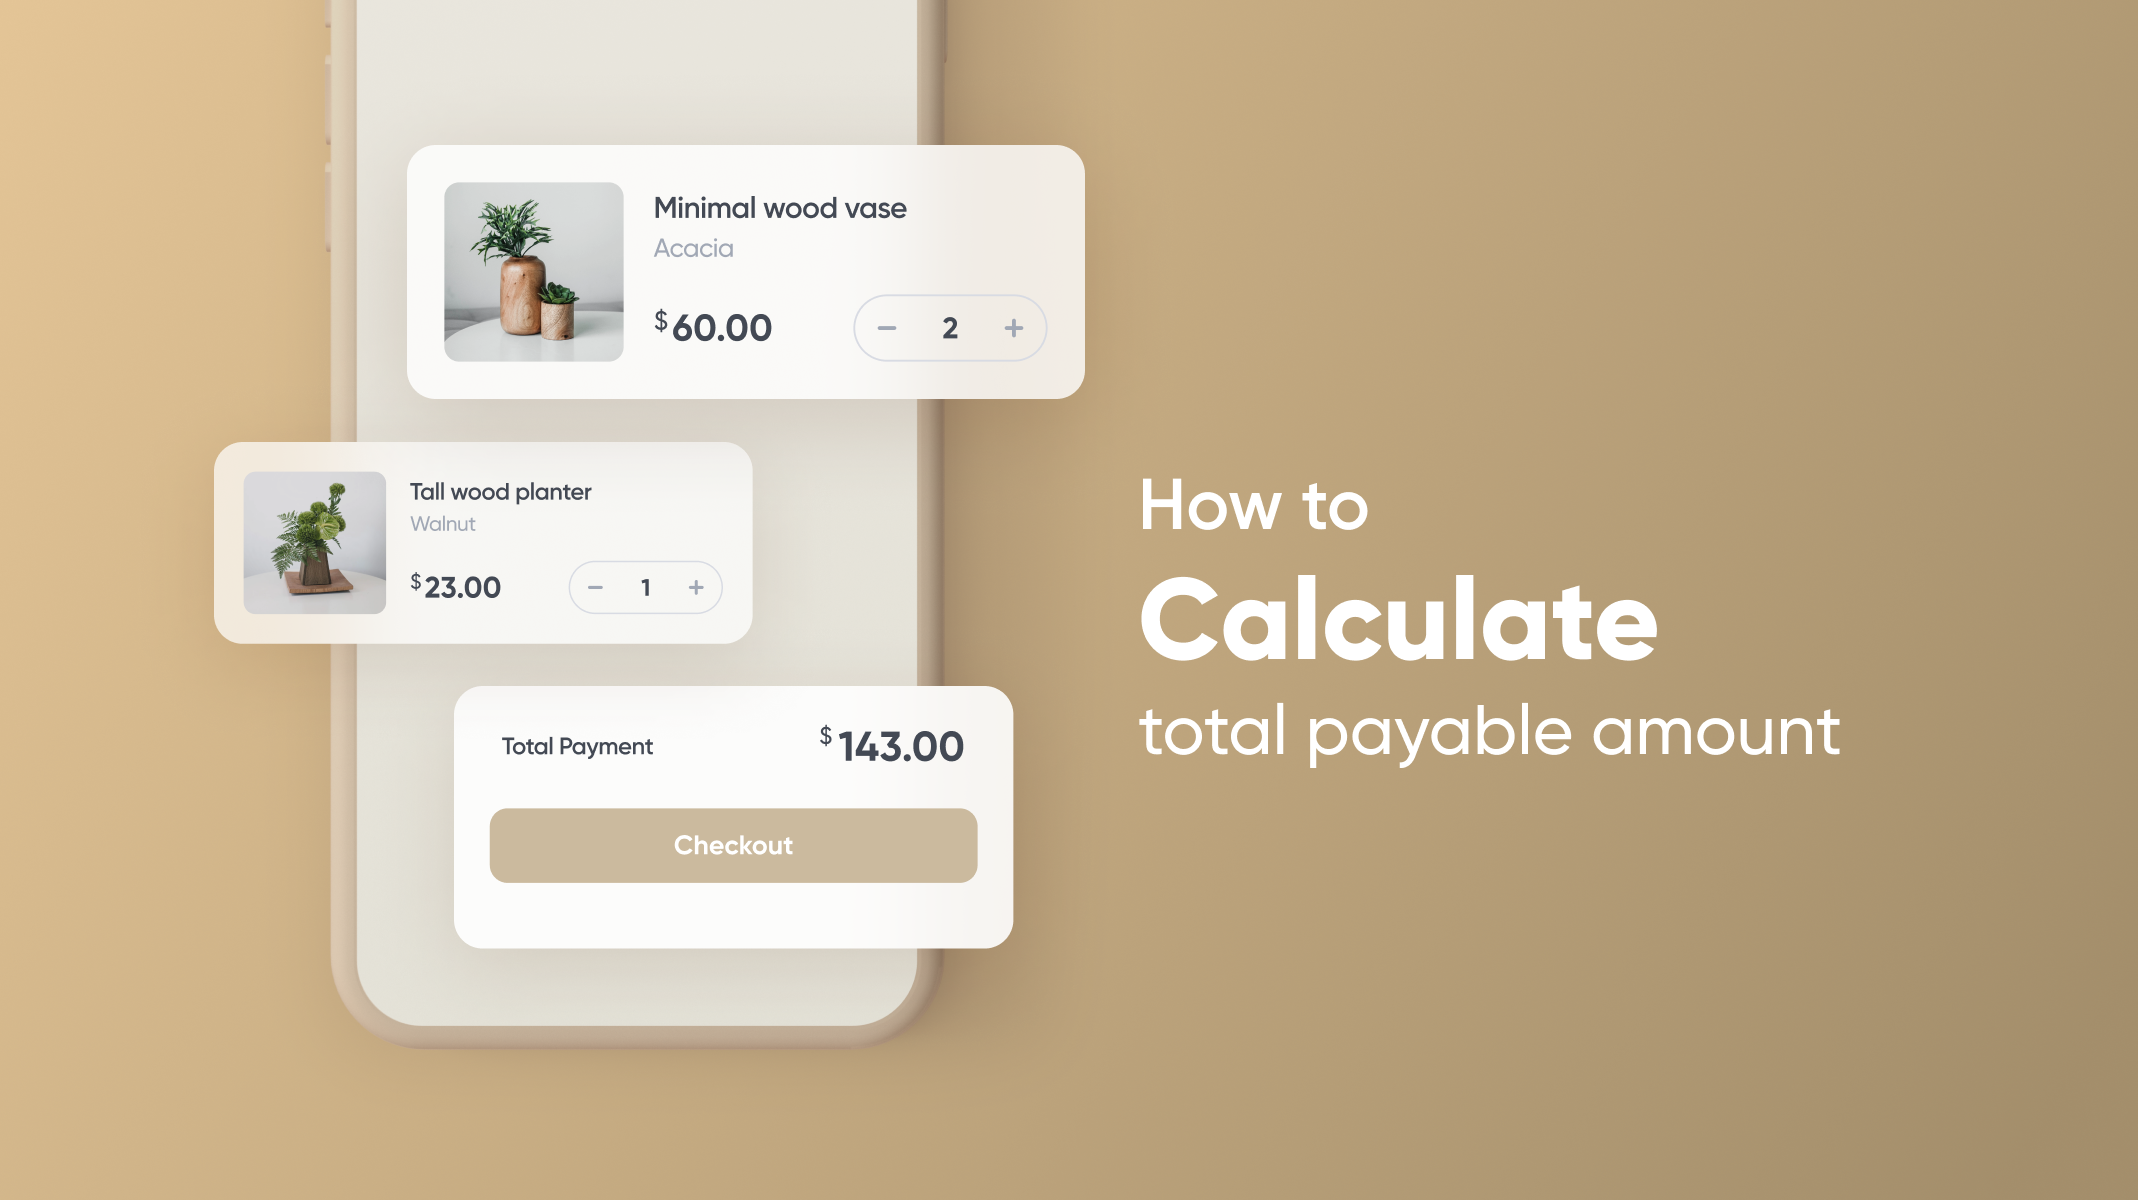
Want to see this stepper interaction applied to an e-commerce item checkout with editable quantities? Check Calculating Total Payable Amount in the Shopping Cart Using Component to learn more.
Did this use case tutorial help you? Take part in this 1-min survey to help us to improve our educational content.

.jpg)