How to Do Voice & Cross-Device Prototyping
Get started creating mind-blowing prototypes with voice and cross-device interactions!
.jpeg)
.jpg)
In an era of voice-activated devices and seamless cross-device experiences, mastering the art of prototyping voice and cross-device interactions has become a necessity for designers.
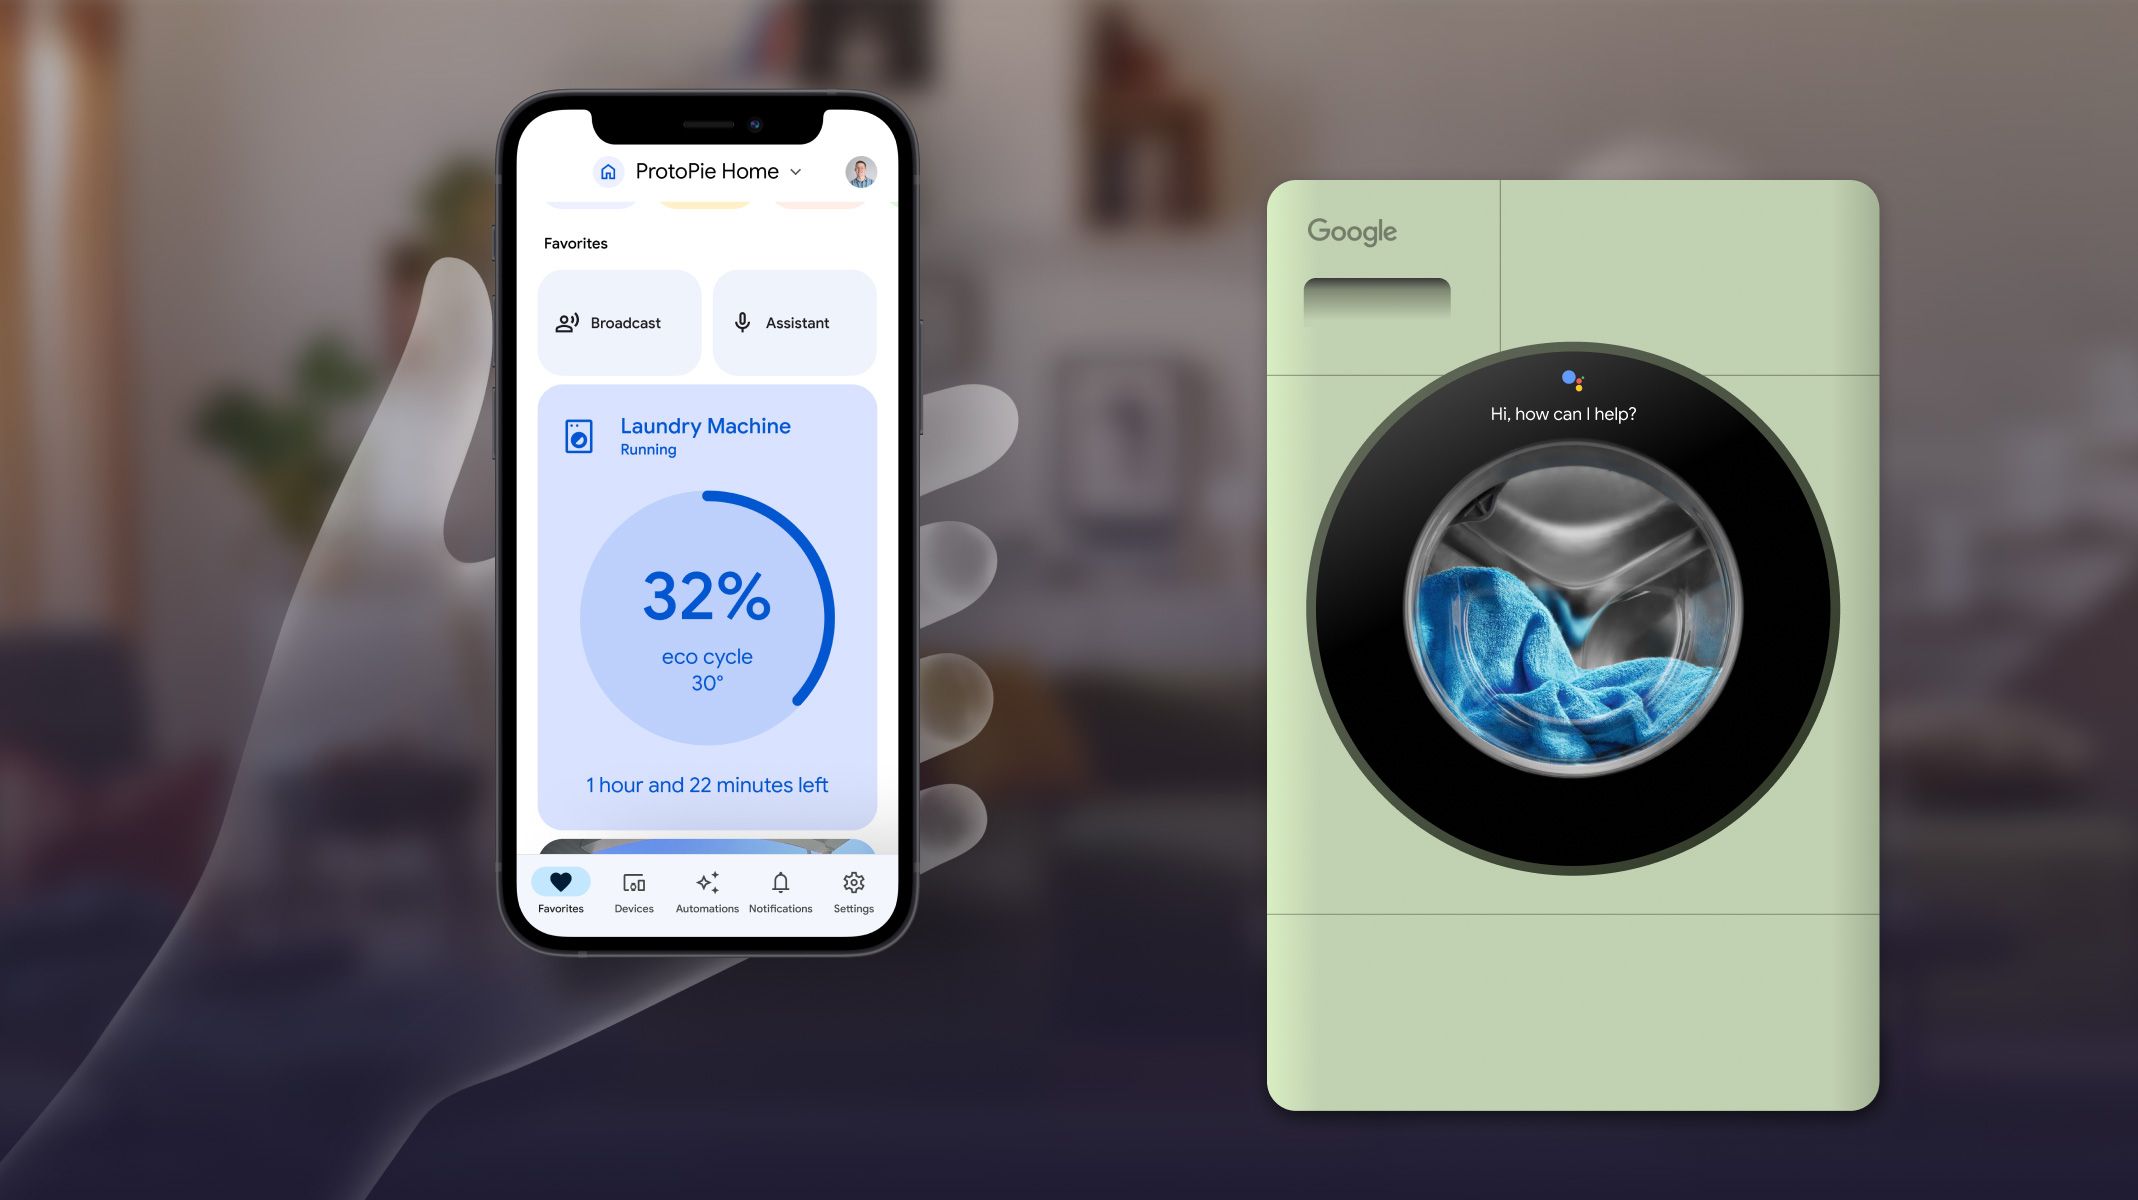
In this article, we'll show you how to prototype voice and cross-device interactions by creating a Google laundry machine connected to the Google Home app, all using the power of ProtoPie Connect.
You can take a look at the finished prototype in the demo video below.
What you will learn
In this step-by-step tutorial you will learn:
- how to create a prototype that works with voice commands
- how to use Send and Receive triggers to create cross-device interactions
Let's get started!
1. Getting set up
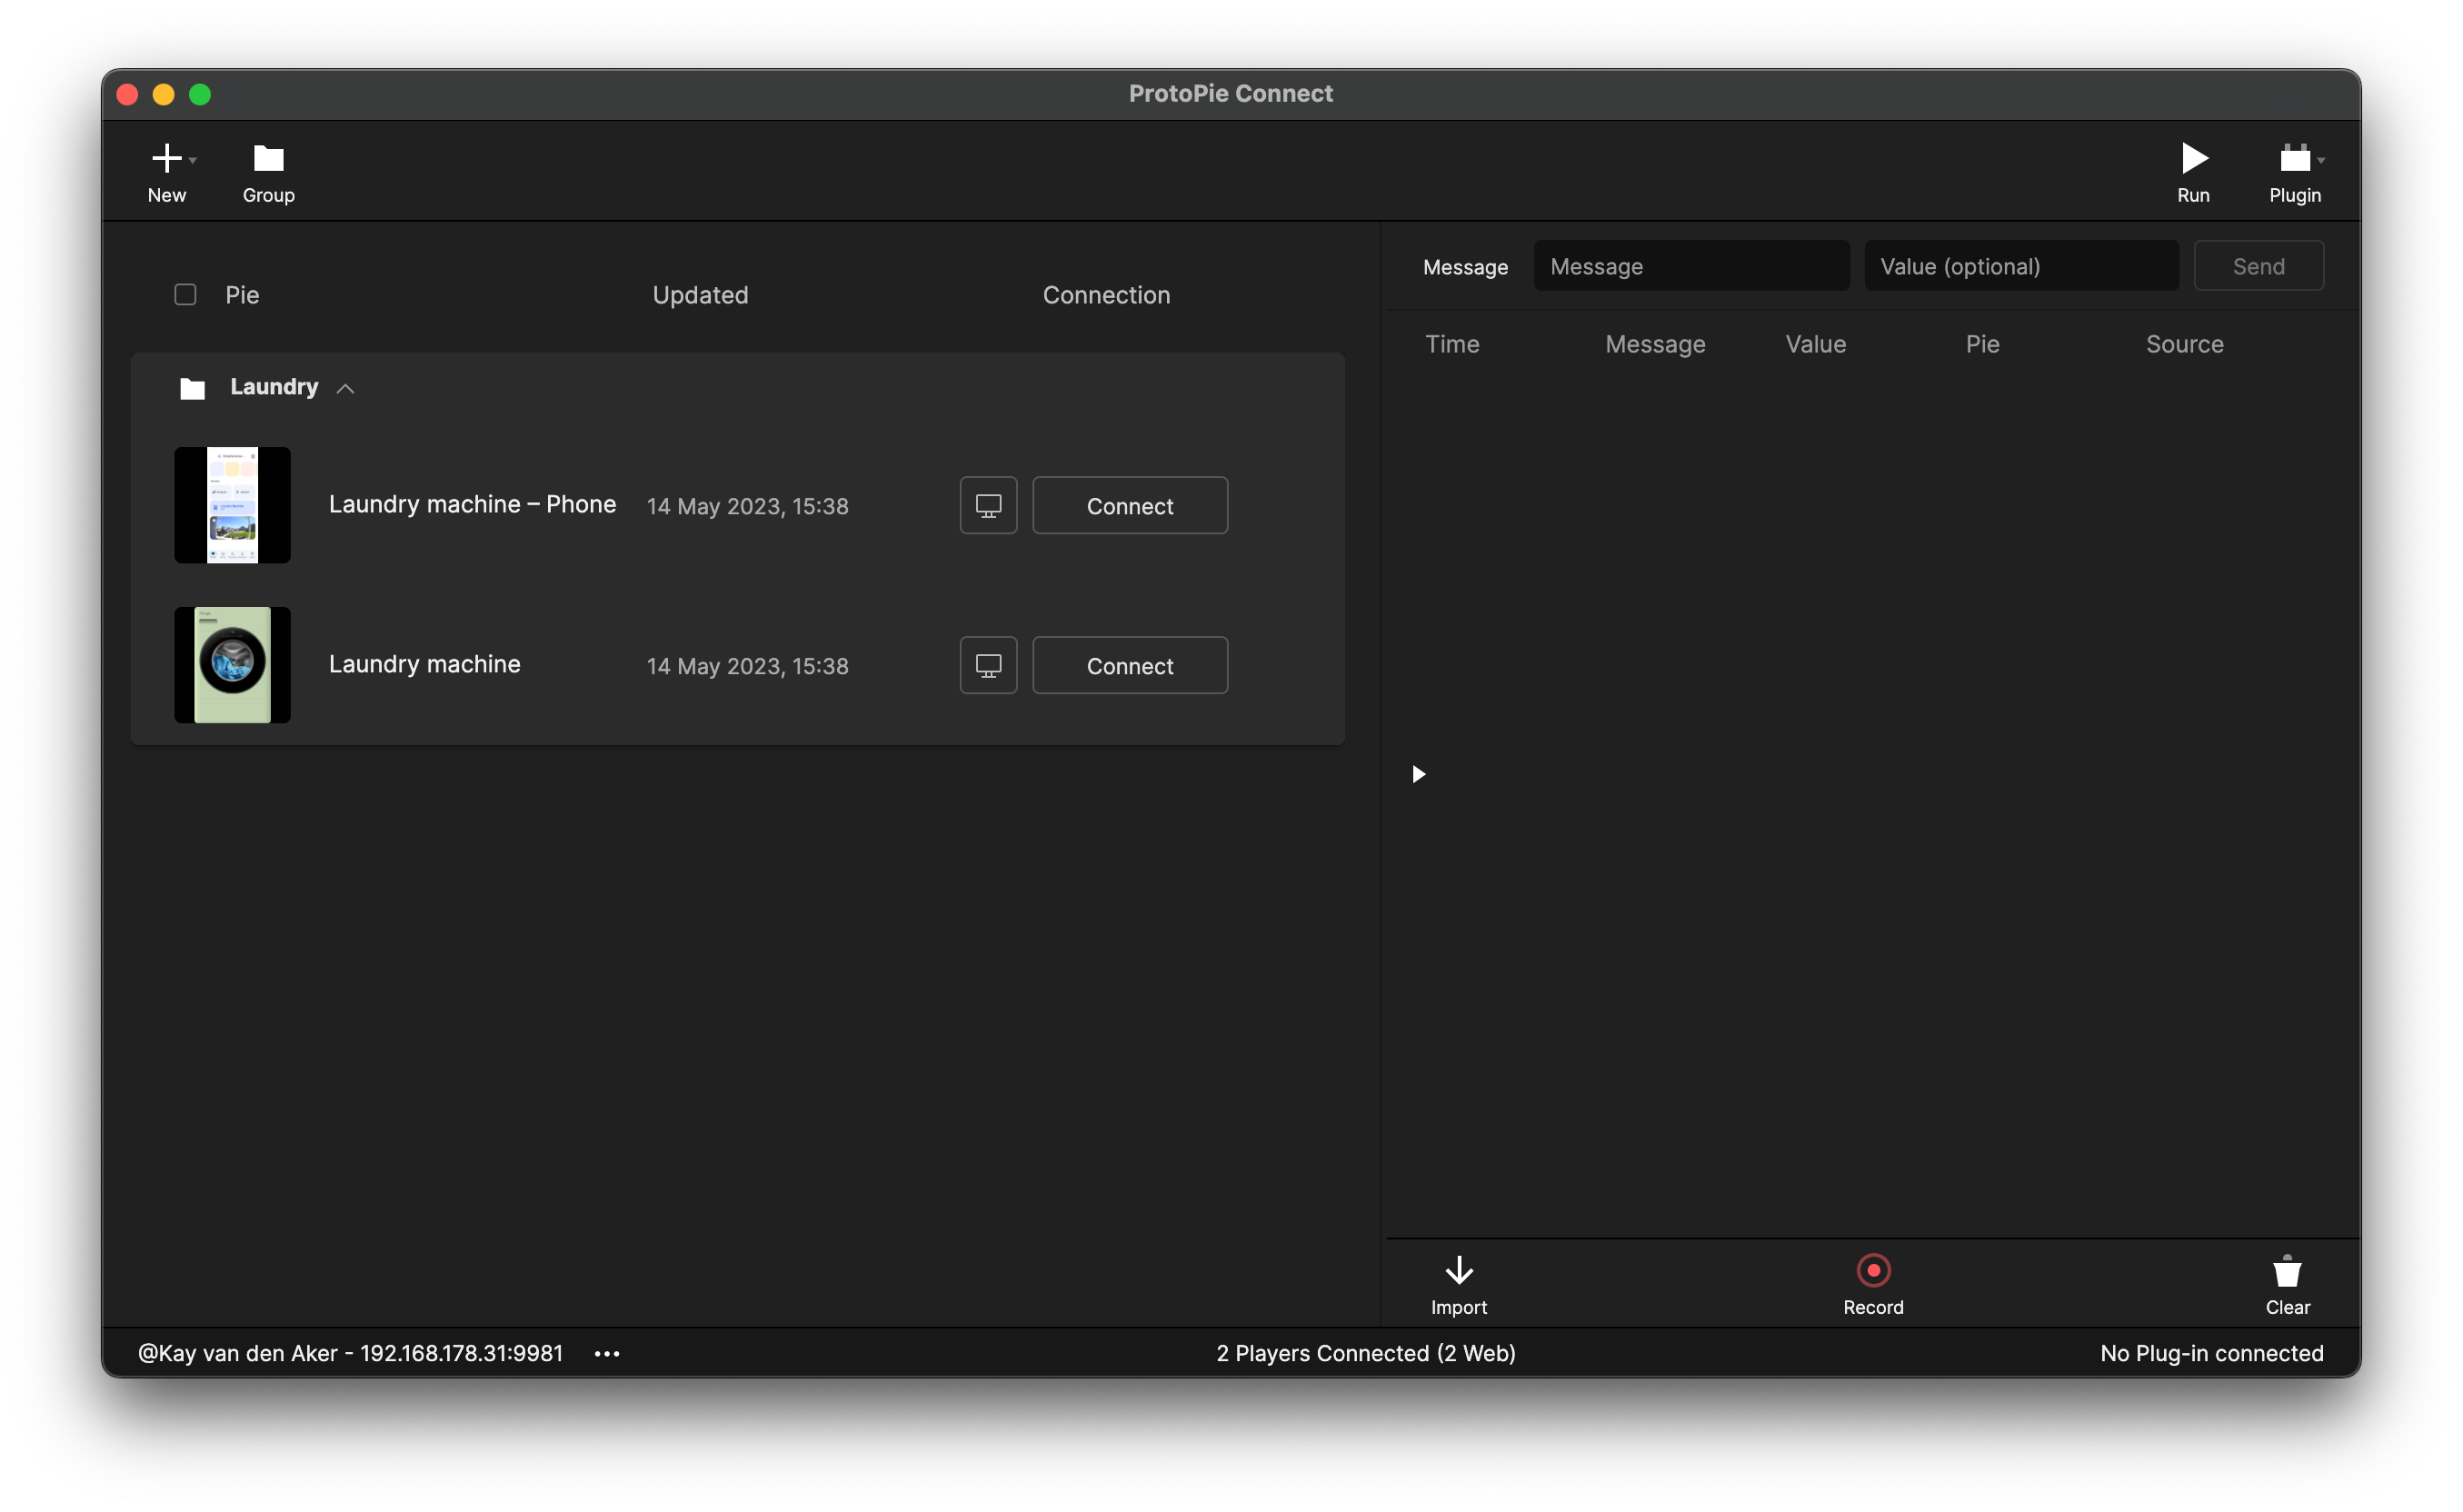
We are using two separate prototypes for the Laundry machine and the Google Home app, so start off by creating two prototypes (Pies) in ProtoPie and saving them locally or on the cloud.
Next, import them into ProtoPie Connect and open them there. That’ll allow us to use the Send and Receive triggers between the two Pies.
If you want to recreate the demo, you can import the designs from Figma, or download the finished ProtoPie files for the laundry machine and the phone.
2. Using a Start trigger to start the animation
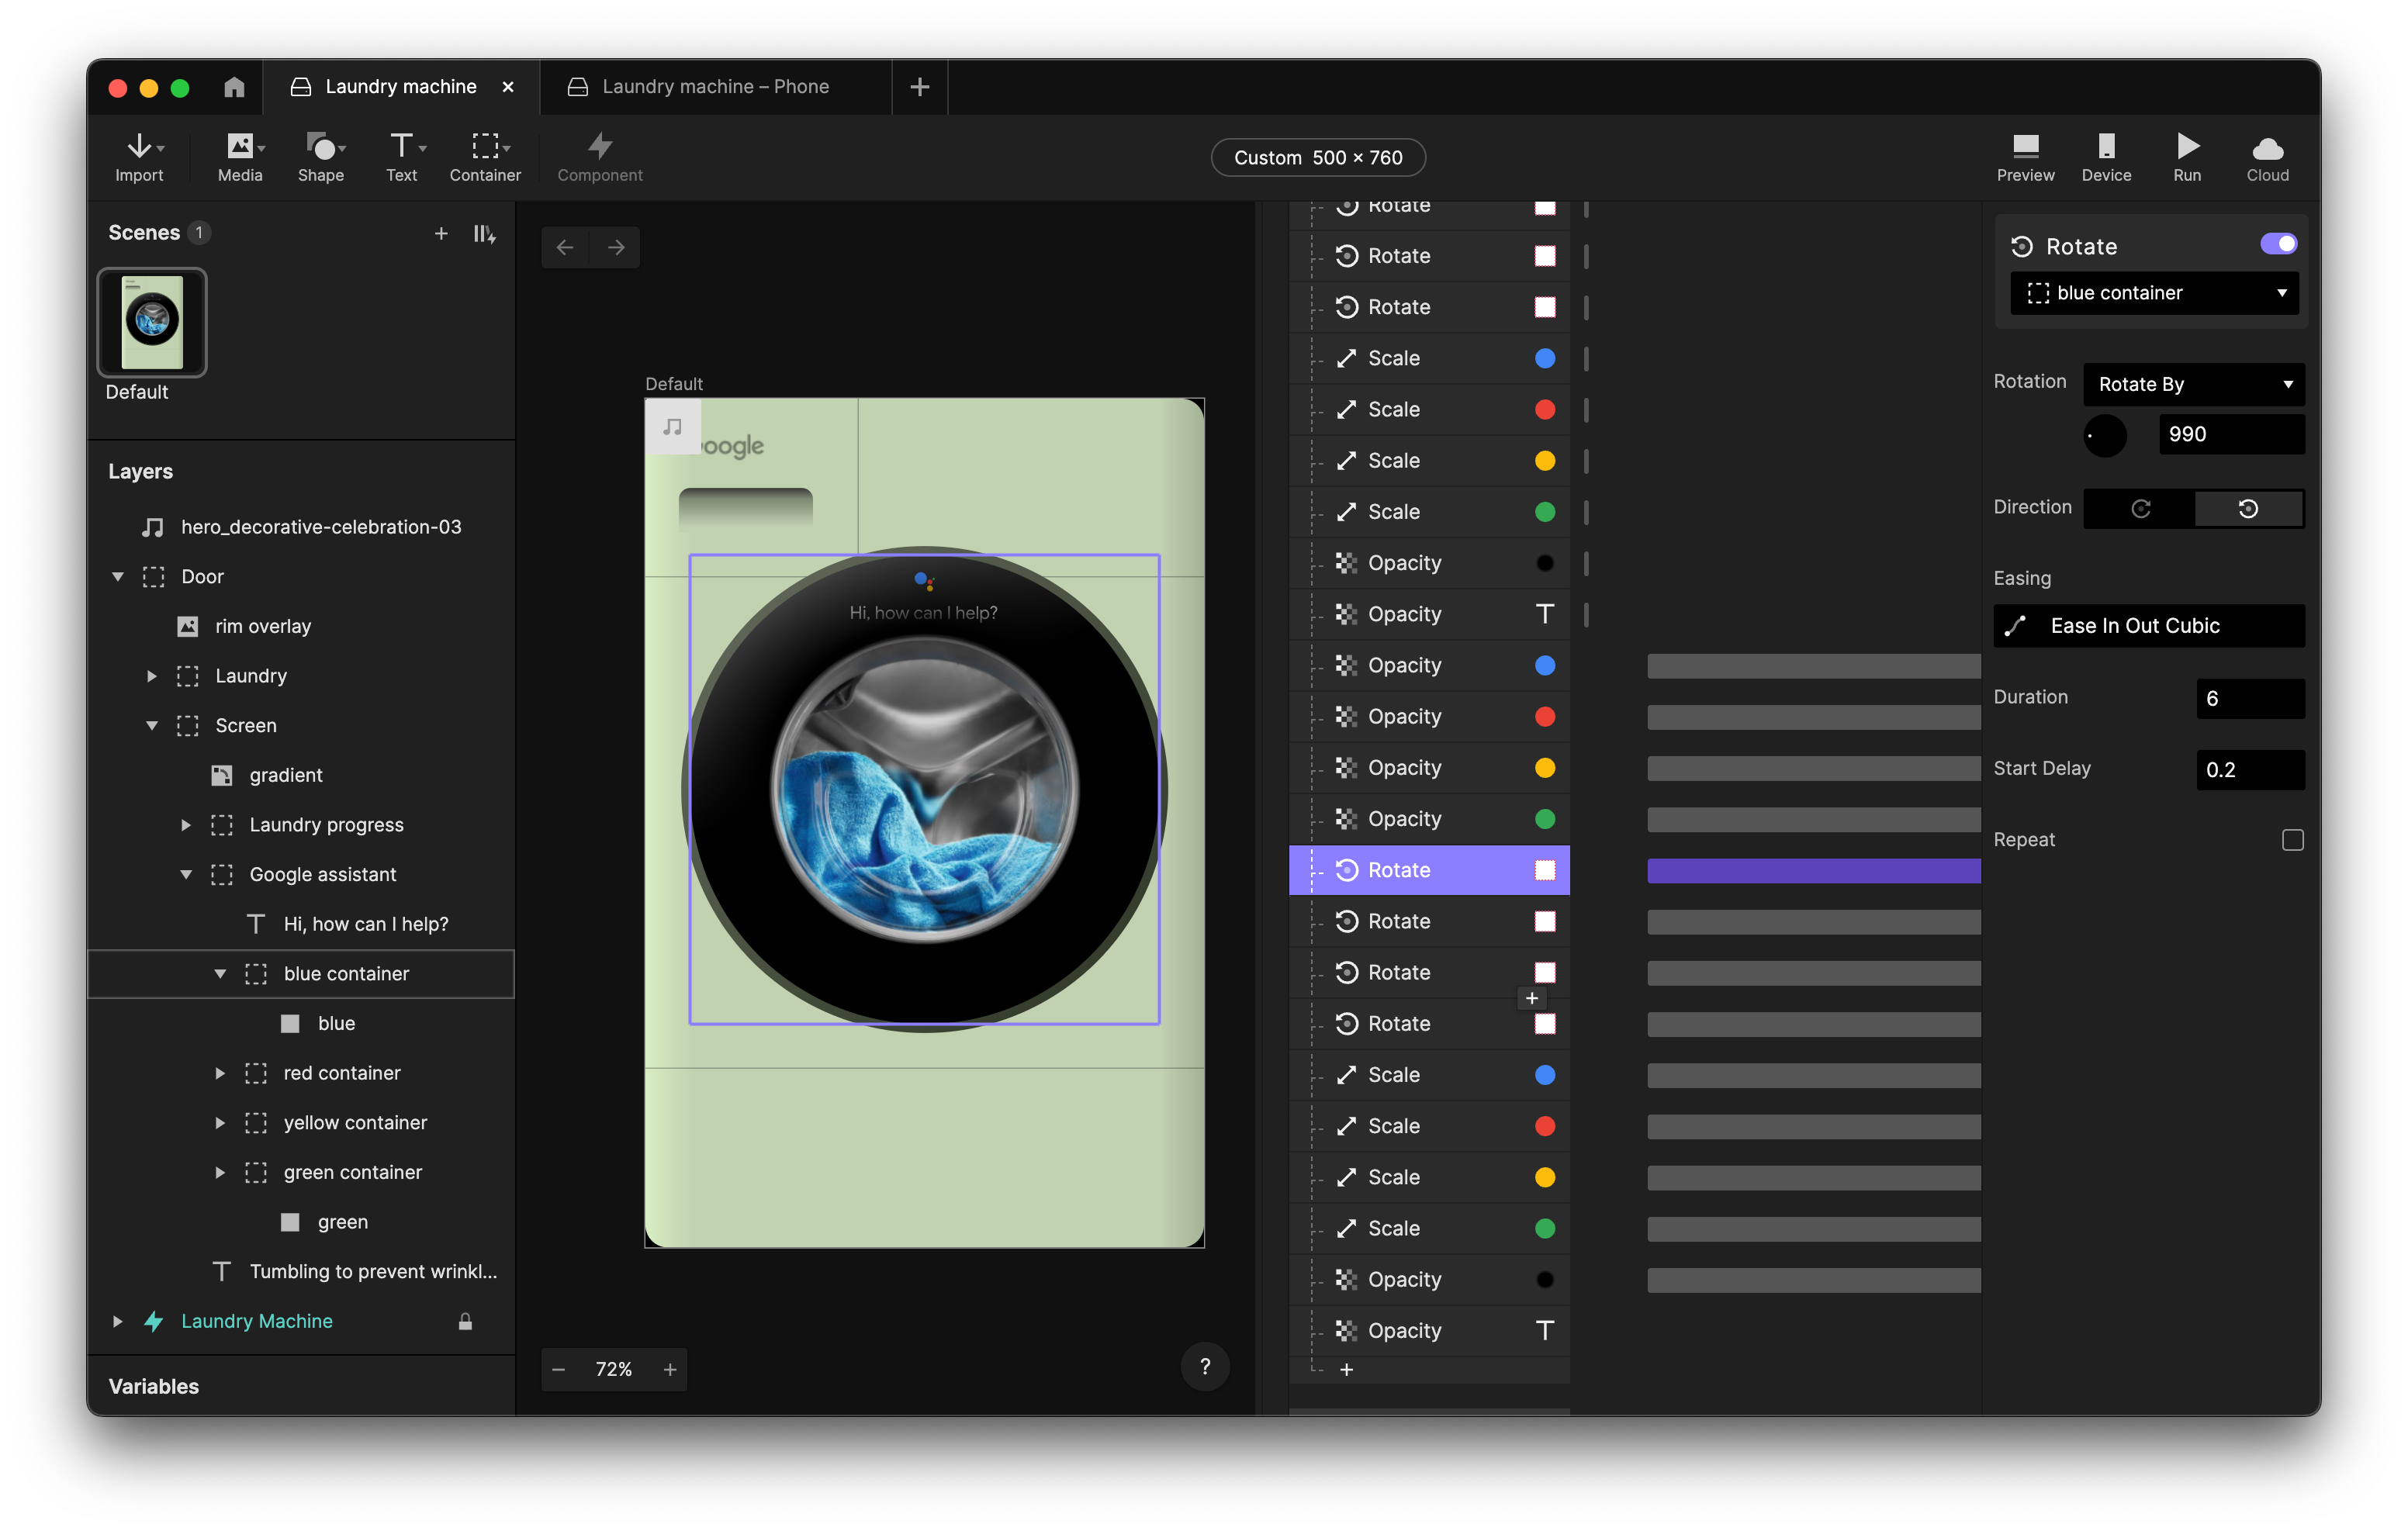
We start the demo with a simple animation on the laundry machine that begins when you launch the Pie.
We use a Start trigger to instantly move and rotate the dots, and then animate them back to their original location and scale. This makes it much easier to explore different amounts of rotation and scaling. Also, using a container for each dot allows for easier individual rotation while ending up at the same location.
3. Create a Listen response
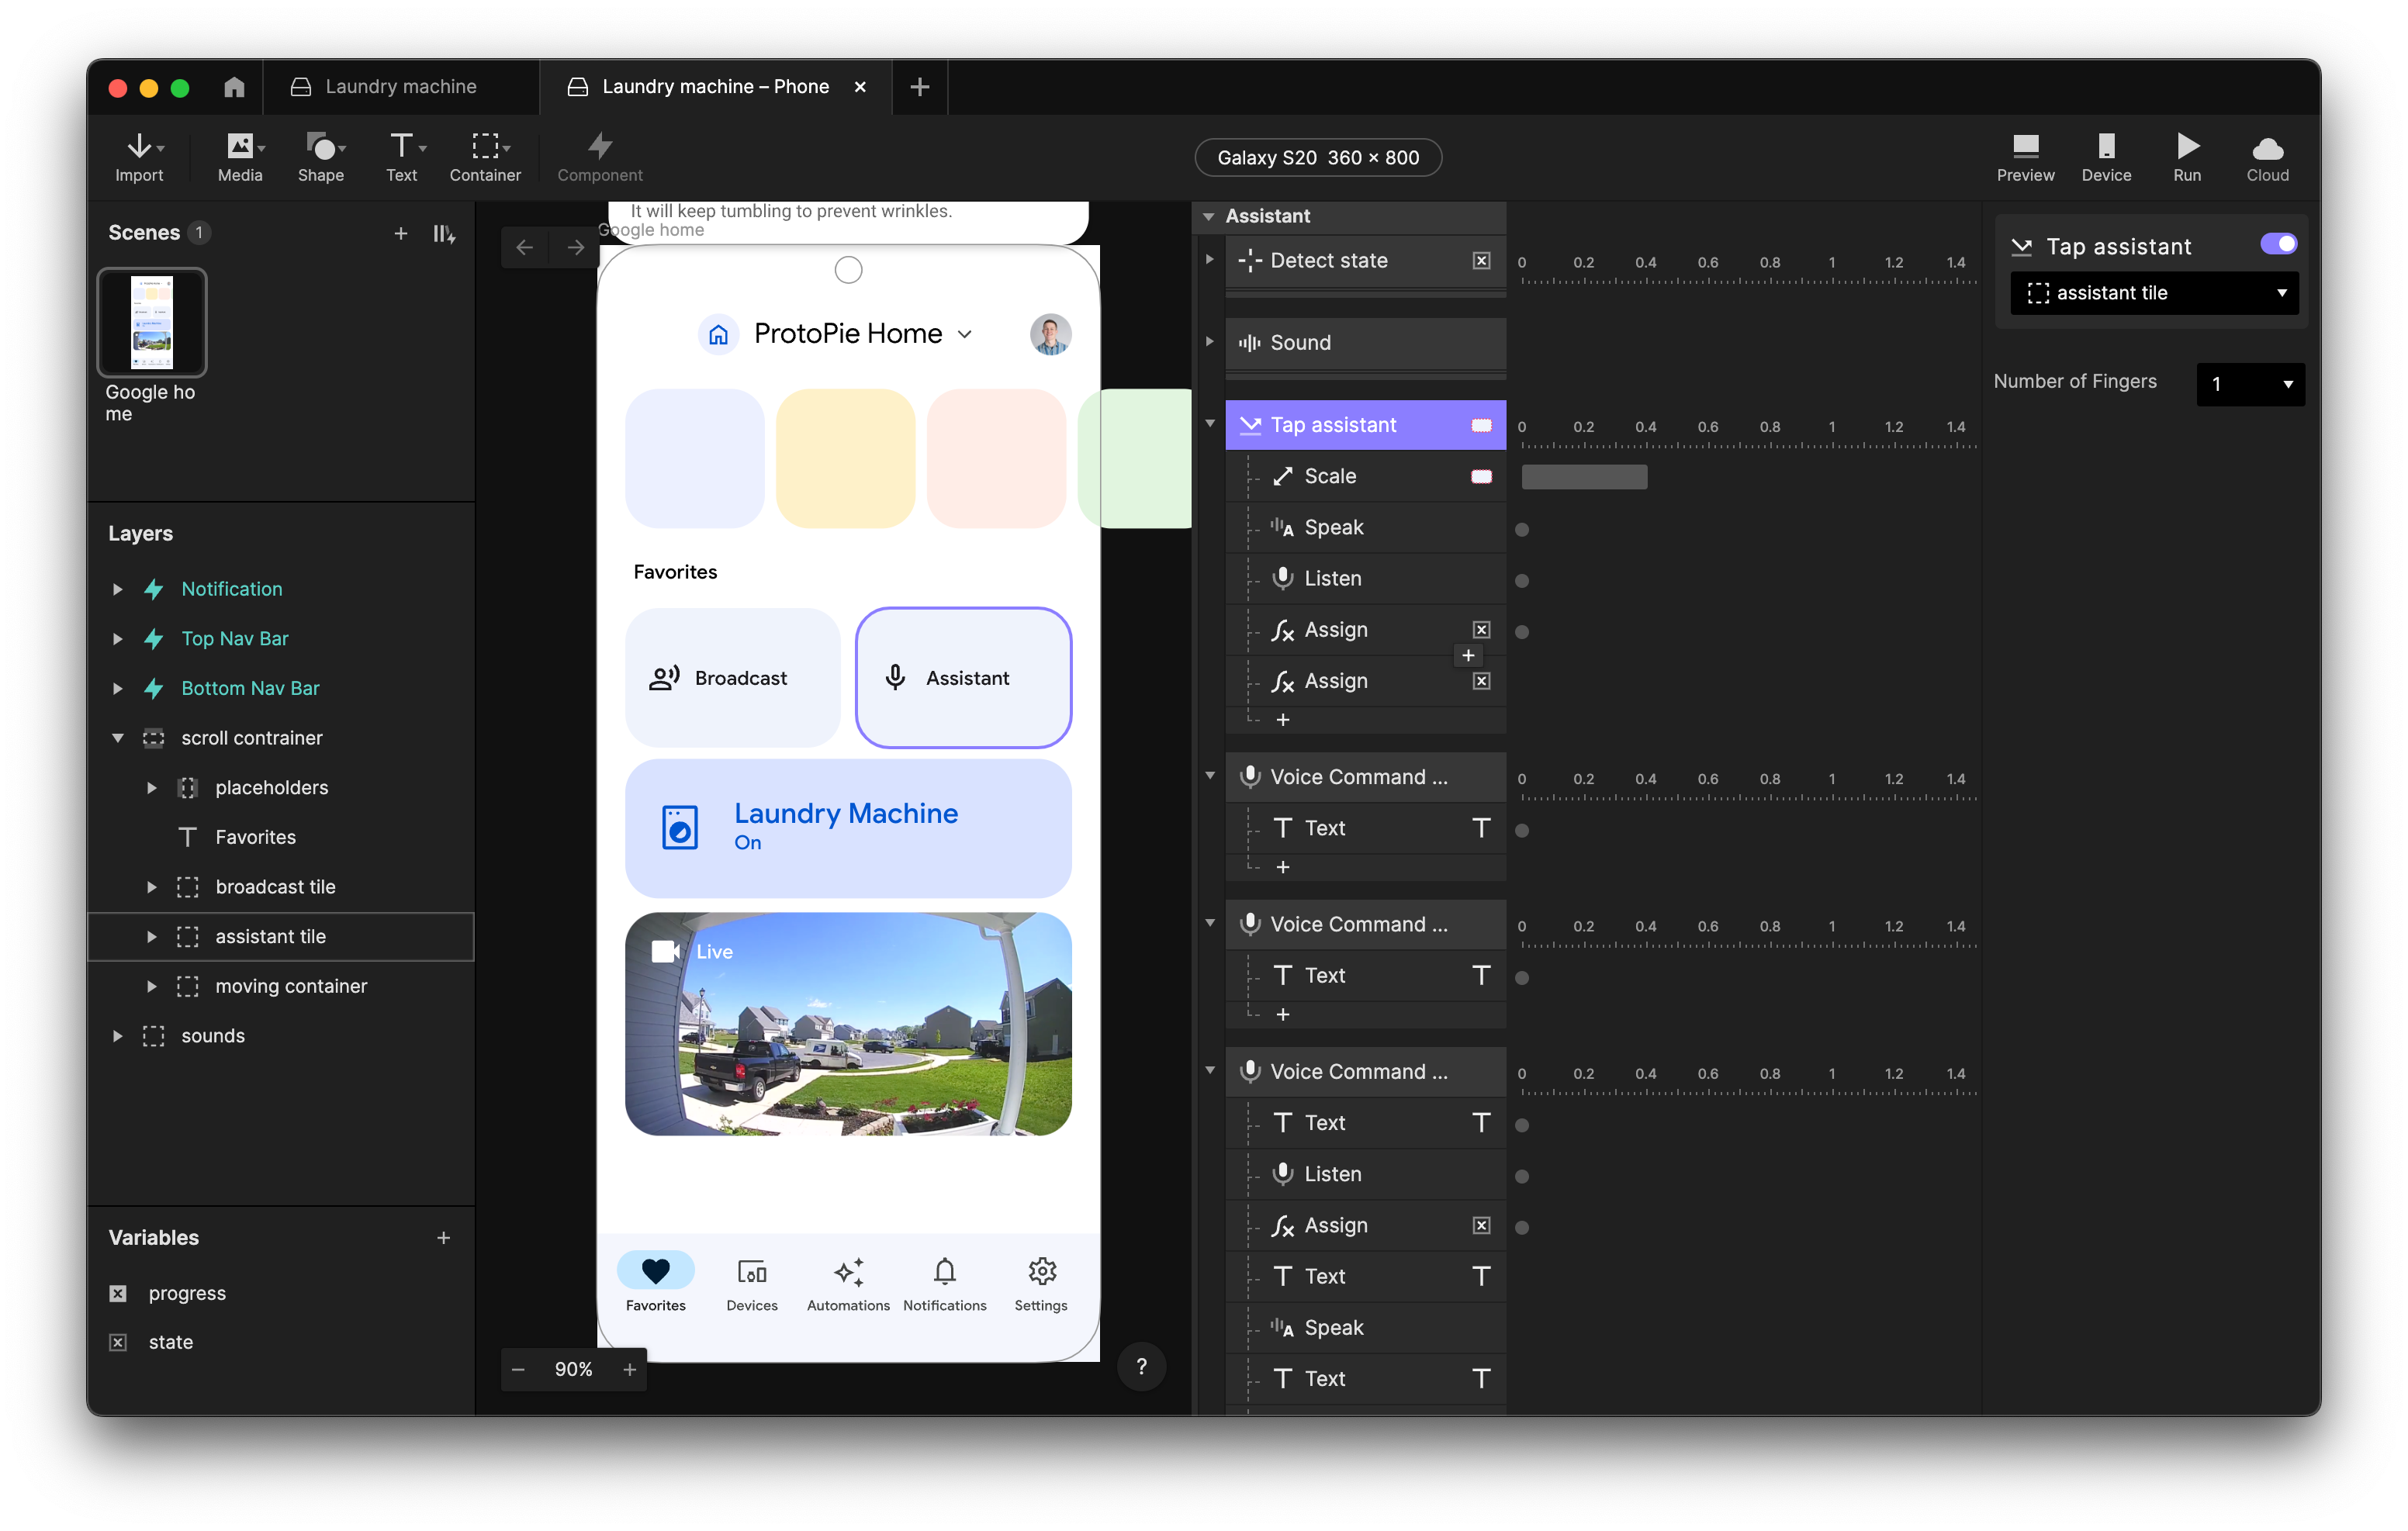
We are starting off our journey in the app by tapping on the assistant. This will scale up the tile, and the prototype will say “Hi, how can I help?” and start listening for responses.
It will assign the variable "state" to "idle" initially, and then, after 2.4 seconds when it finishes speaking, it will switch the variable to "listening".
4. Use a state variable for animations between looped animations
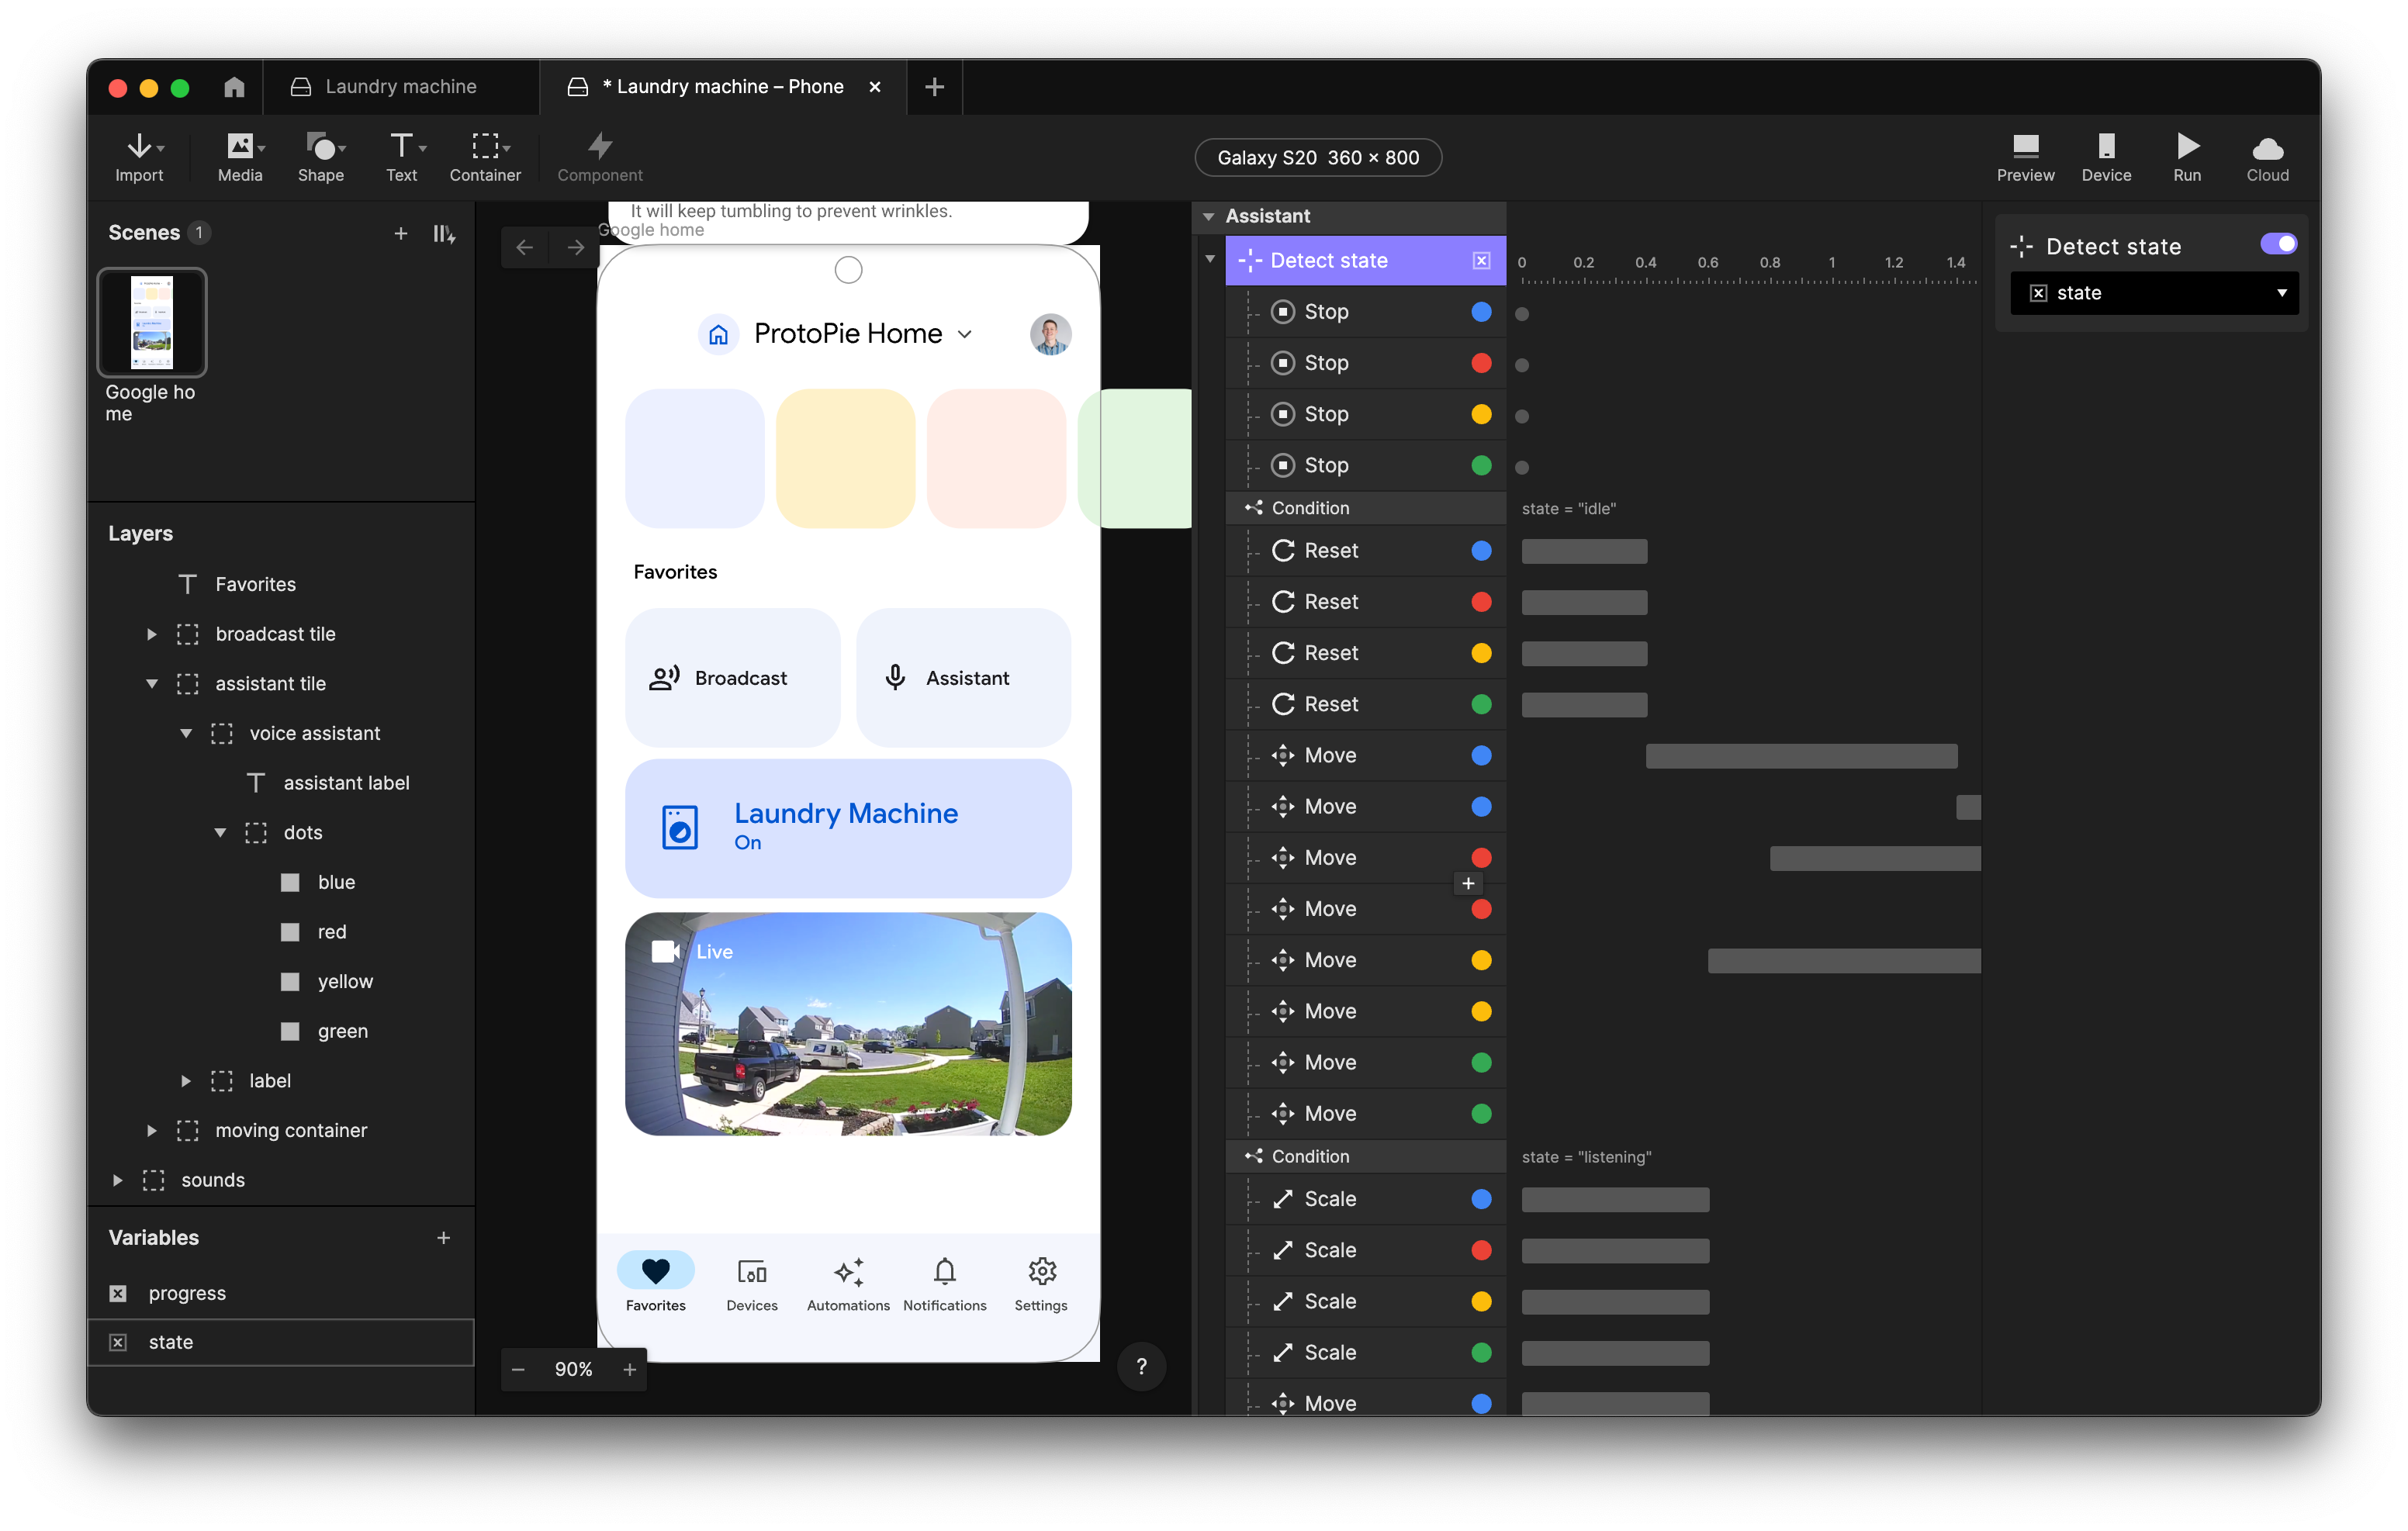
We are using the state variable to animate between various looped animations that the Google assistant can do.
For instance, in the "idle" state, the dots slowly move up and down, while in the "listening" state, they align horizontally and respond to sound cues.
To ensure smooth animation transitions, it's crucial to first halt any ongoing animation before initiating a new one. This prevents any interference and ensures that the desired animation starts promptly.
5. Stack multiple voice commands
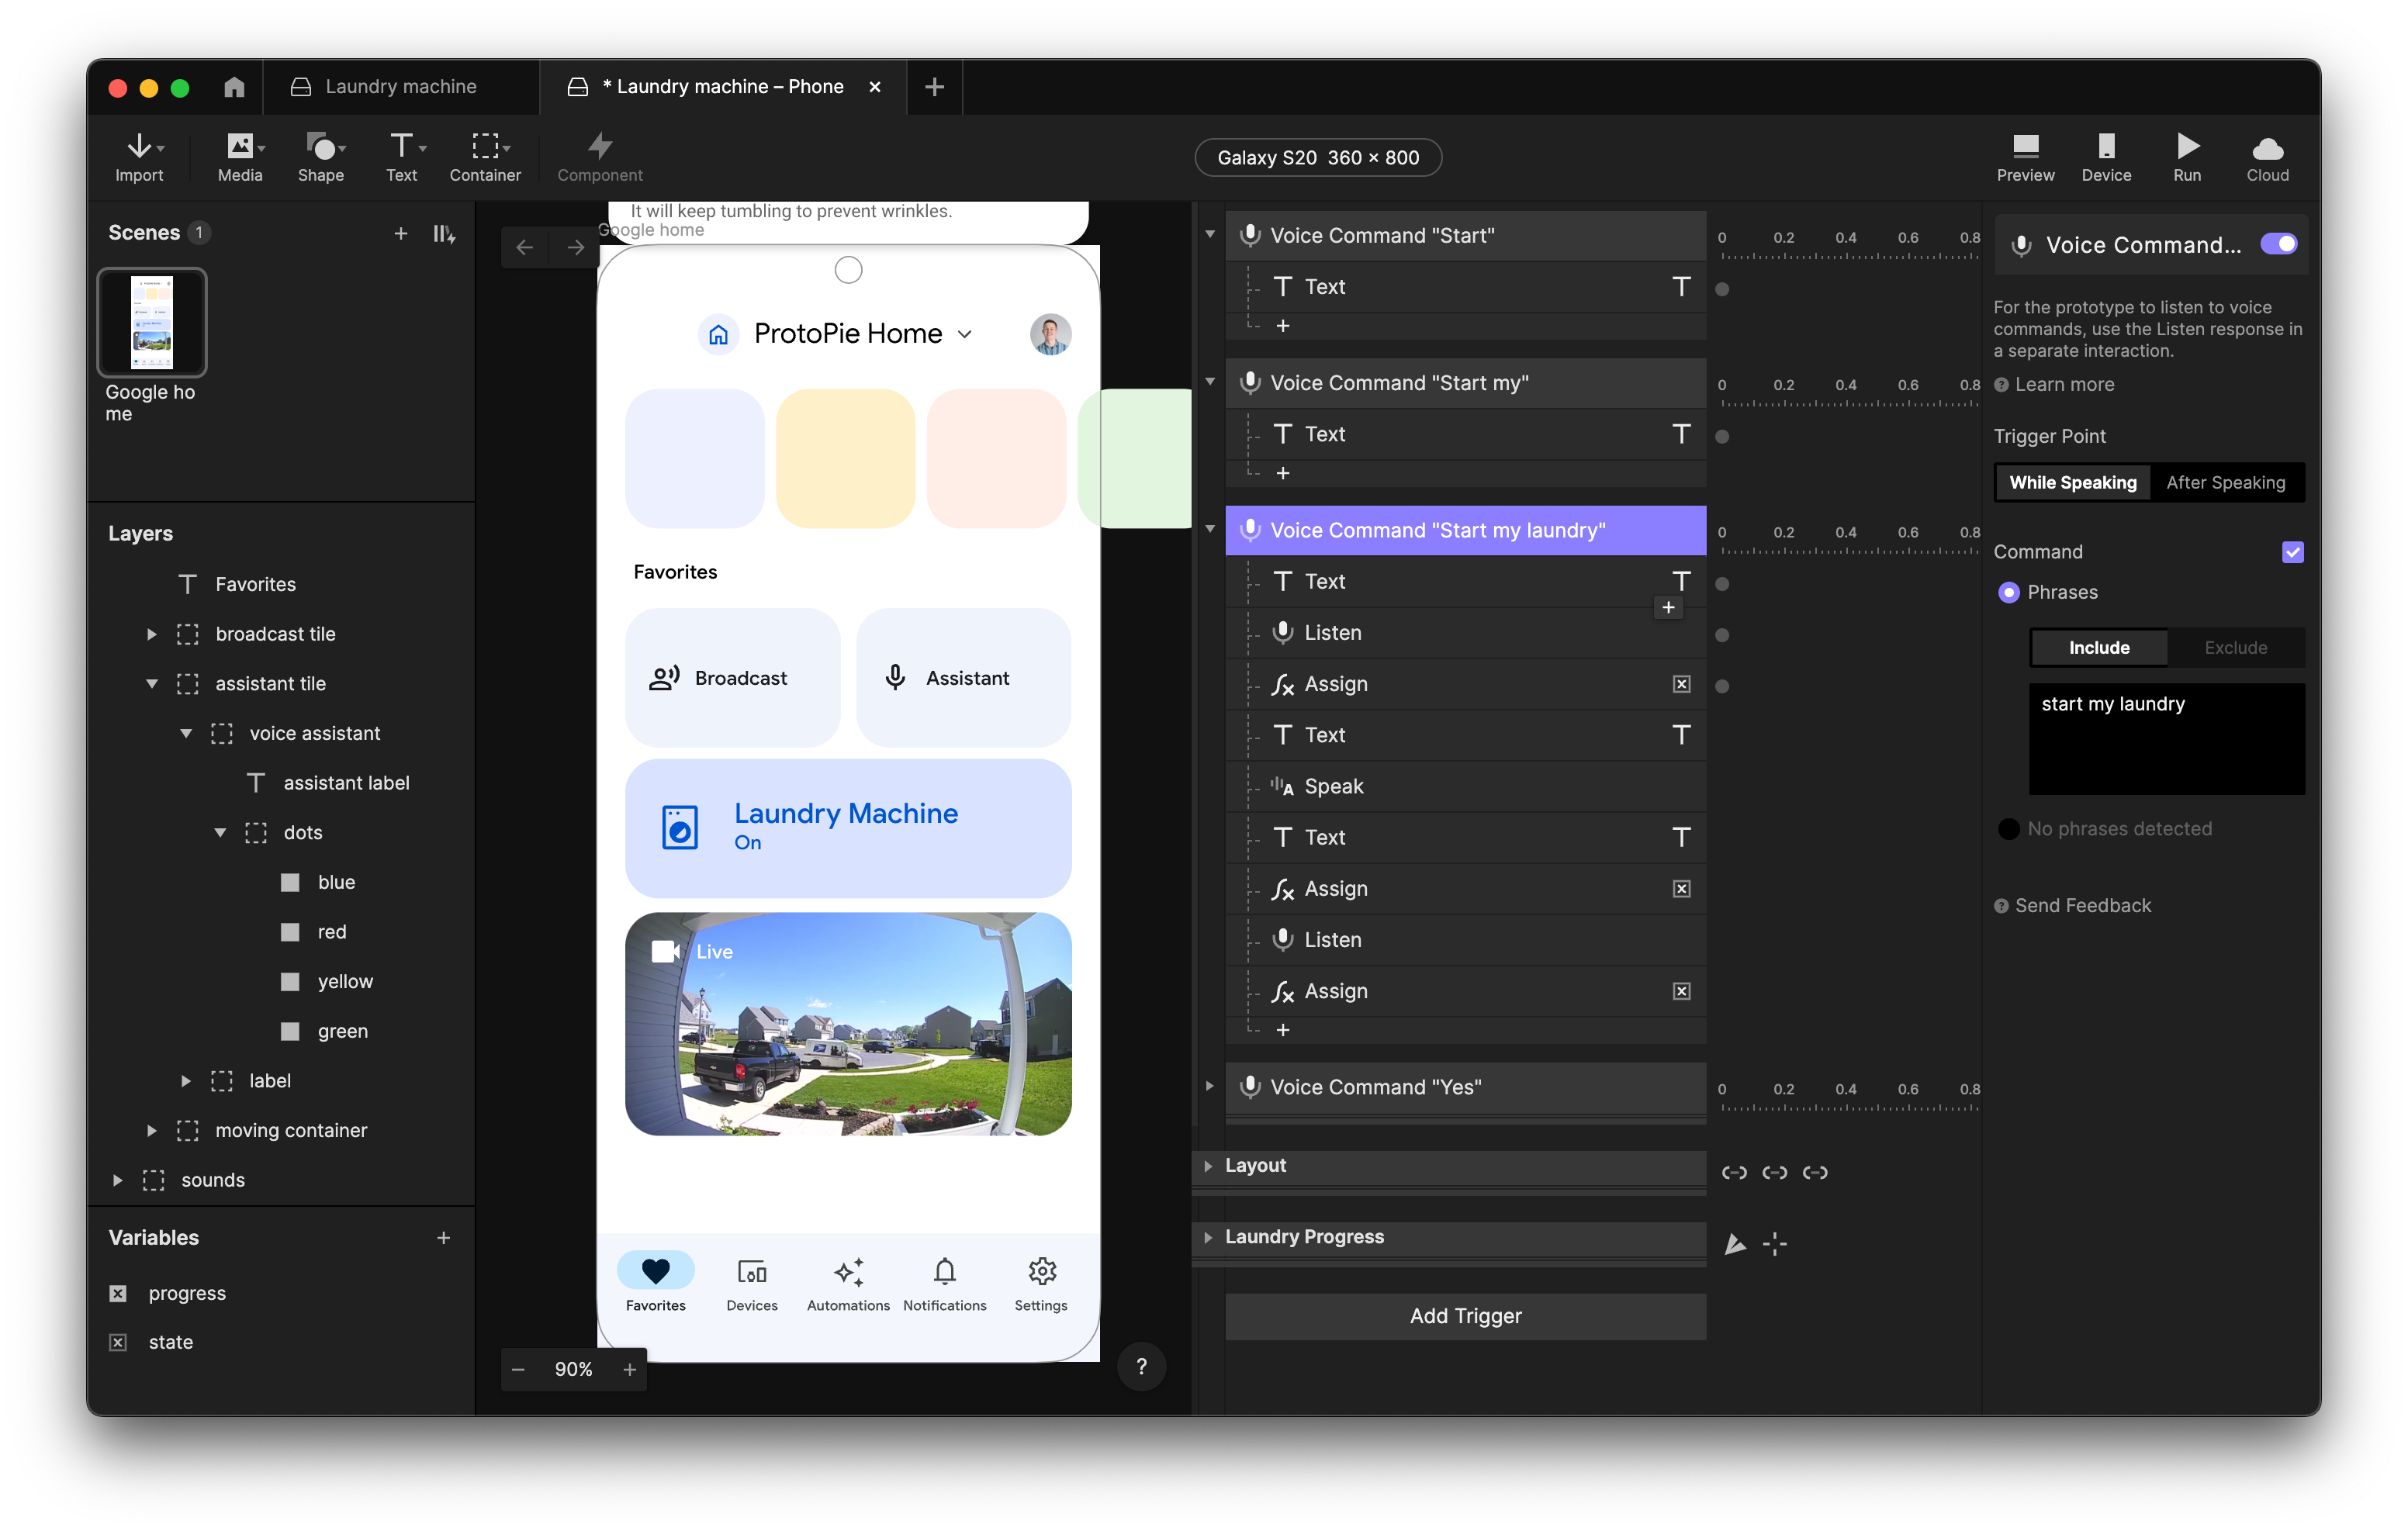
So, now that the Pie is listening for the user to say something, we can stack multiple voice commands next to each other to change the text whenever it receives parts of the Command.
In our example, it already replaces the text with:
- “Start” when it hears “start”,
- with “Start my” when it hears “start my”,
- and obviously with “Start my laundry” when it hears that sentence.
This allows for more feedback throughout the use of voice commands. It can feel weird for a user to only get feedback after saying a complete sentence, so it’s better if the text is already displayed before a sentence is finished.
Next, when “Start my laundry” is said, the prototype will stop listening and change the state to “loading”. This will start an animation where the four dots are "thinking" for a bit.
After 5 seconds, it will return the state back to “idle” and say “Small colored wash detected. I recommend the 30 eco program, shall I start it?”.
When it is done saying that, it will start listening again and assign the state back to “listening”. There you go, you got stacked multiple voice commands.
If you want to master voice prototyping beyond this tutorial, check out ProtoPie's masterclass on voice assistant prototyping.
6. Create sound-responsive animations
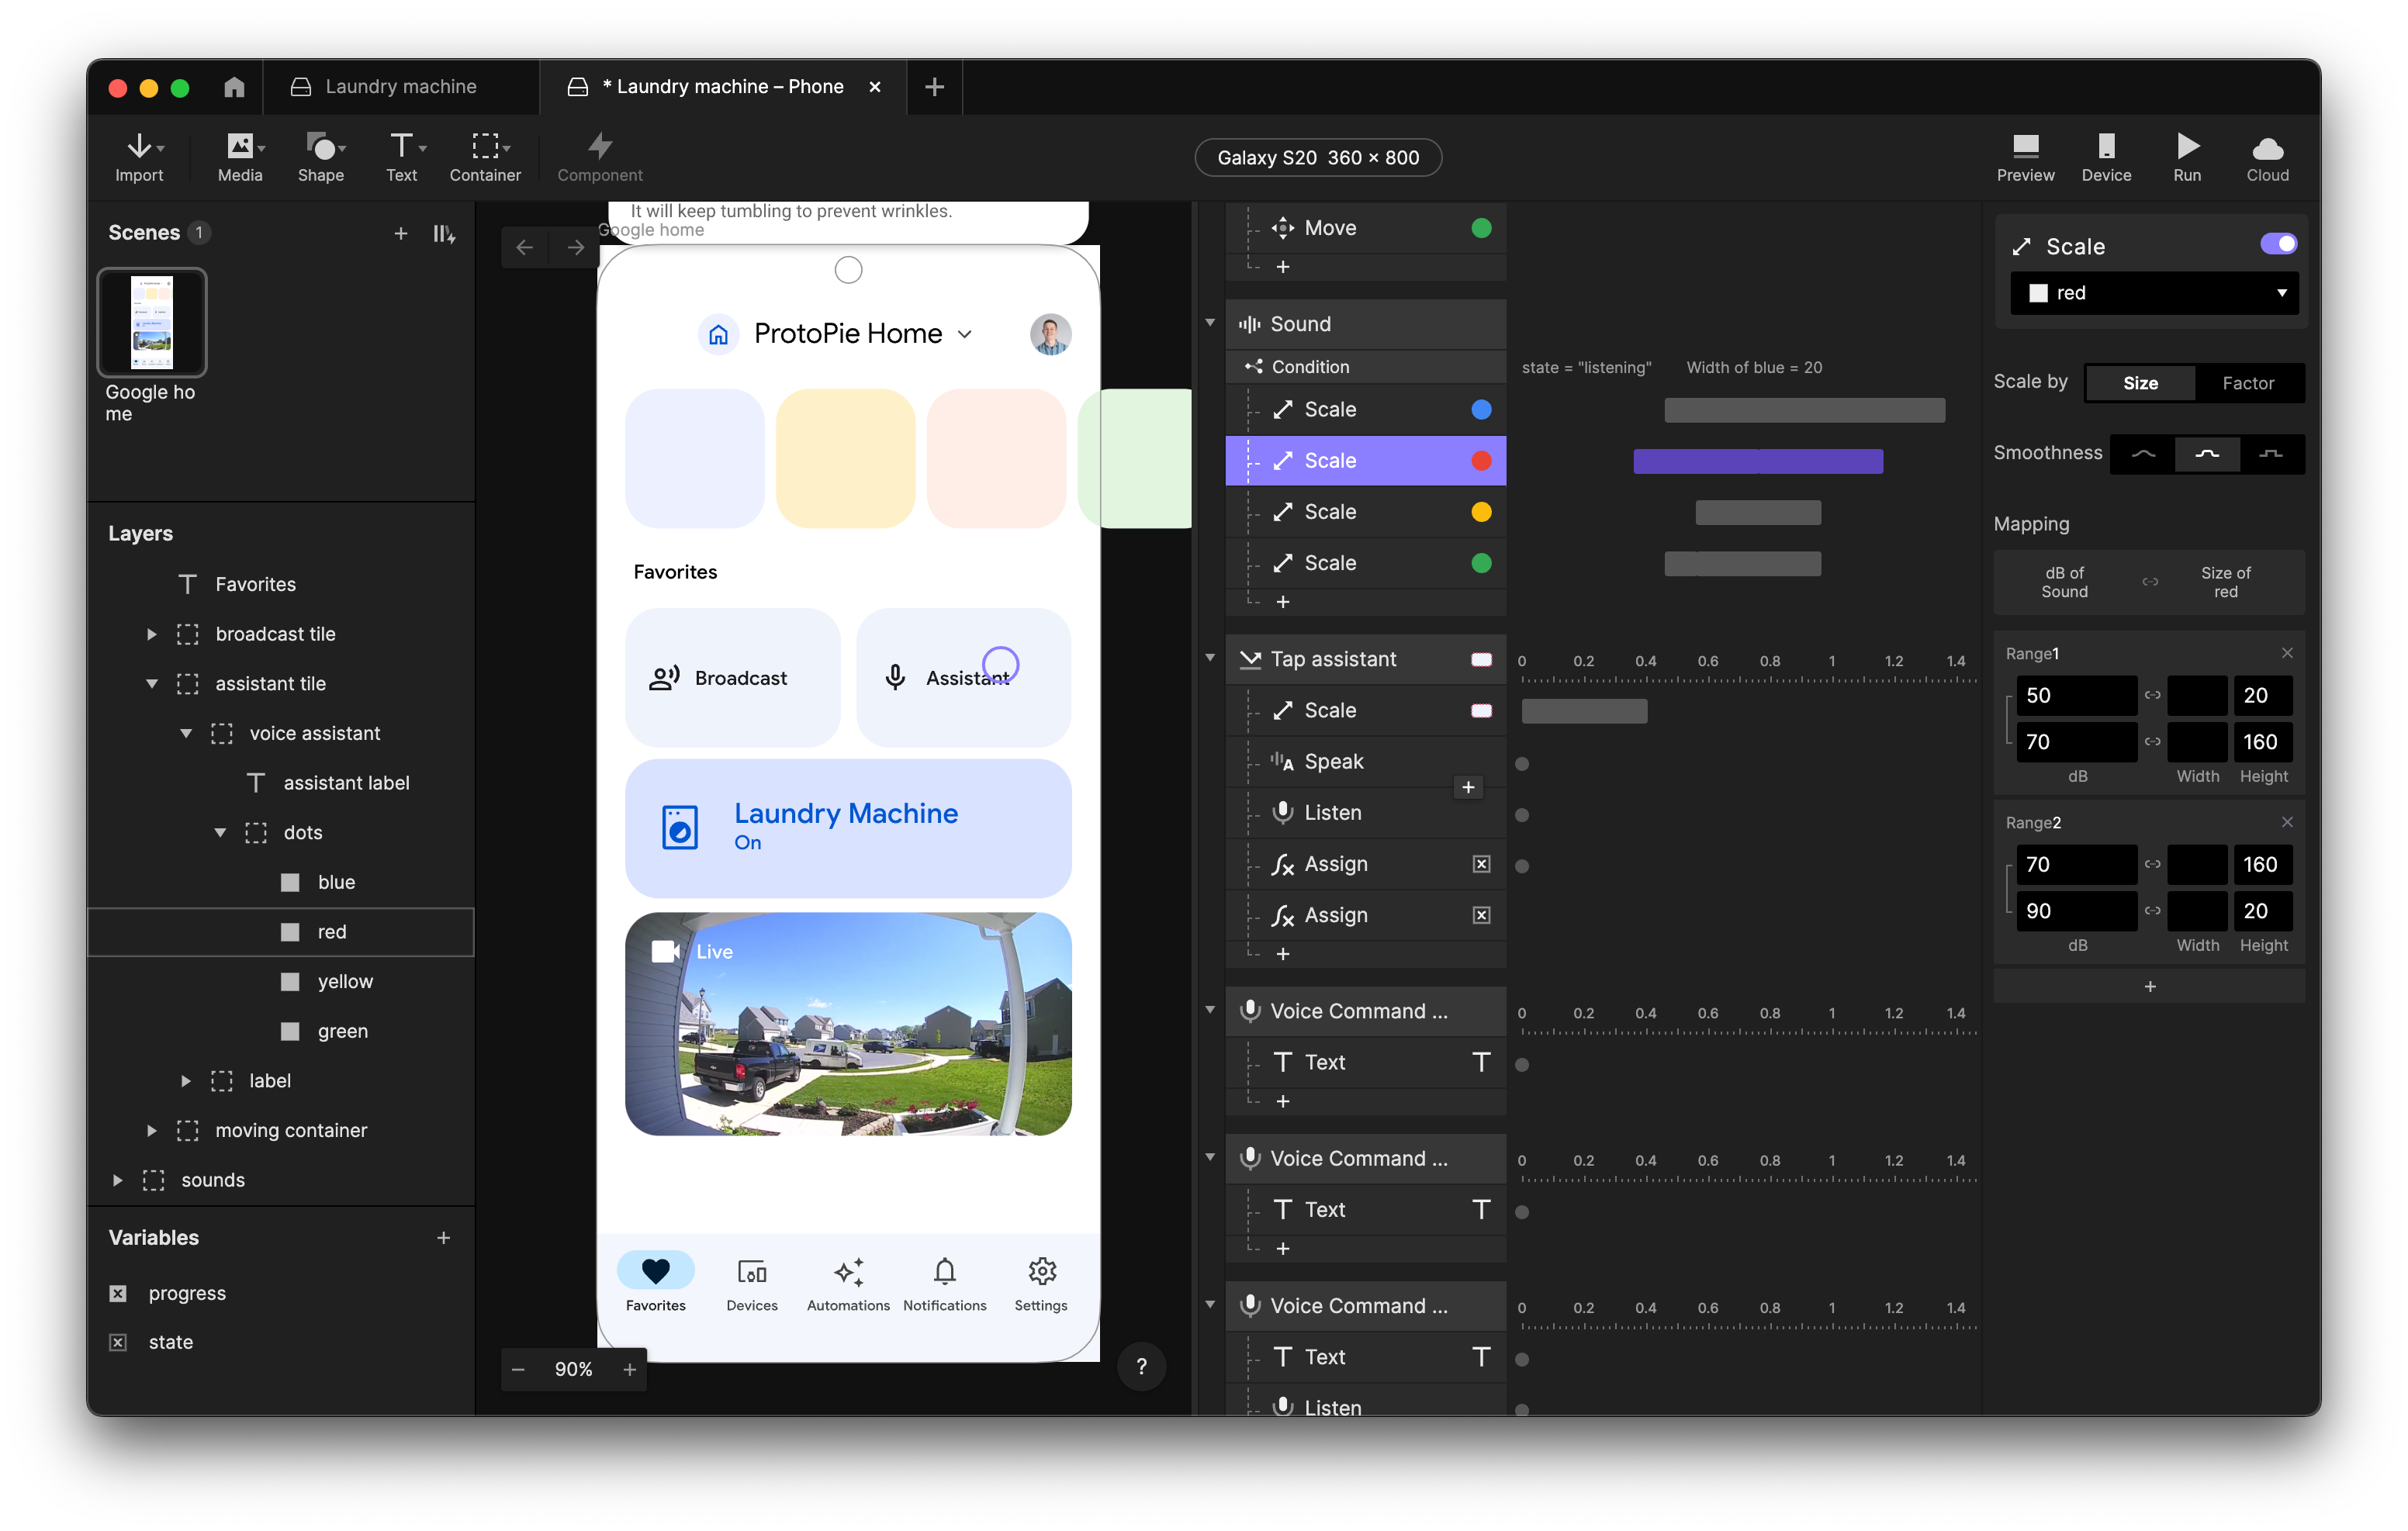
Inside the Sound trigger, we create a Condition that checks if the state variable is equal to “listening”, and if the width of the blue dot is equal to 20, meaning that it is done being animated to its scale and position.
If that is true, we start scaling the dots’ height to create the listening animation where the dots respond to the user’s voice.
You can play around with different ranges of dB, in this example, we use various ranges for the dots so they respond differently and look more vibrant.
7. Send a message to ProtoPie Connect
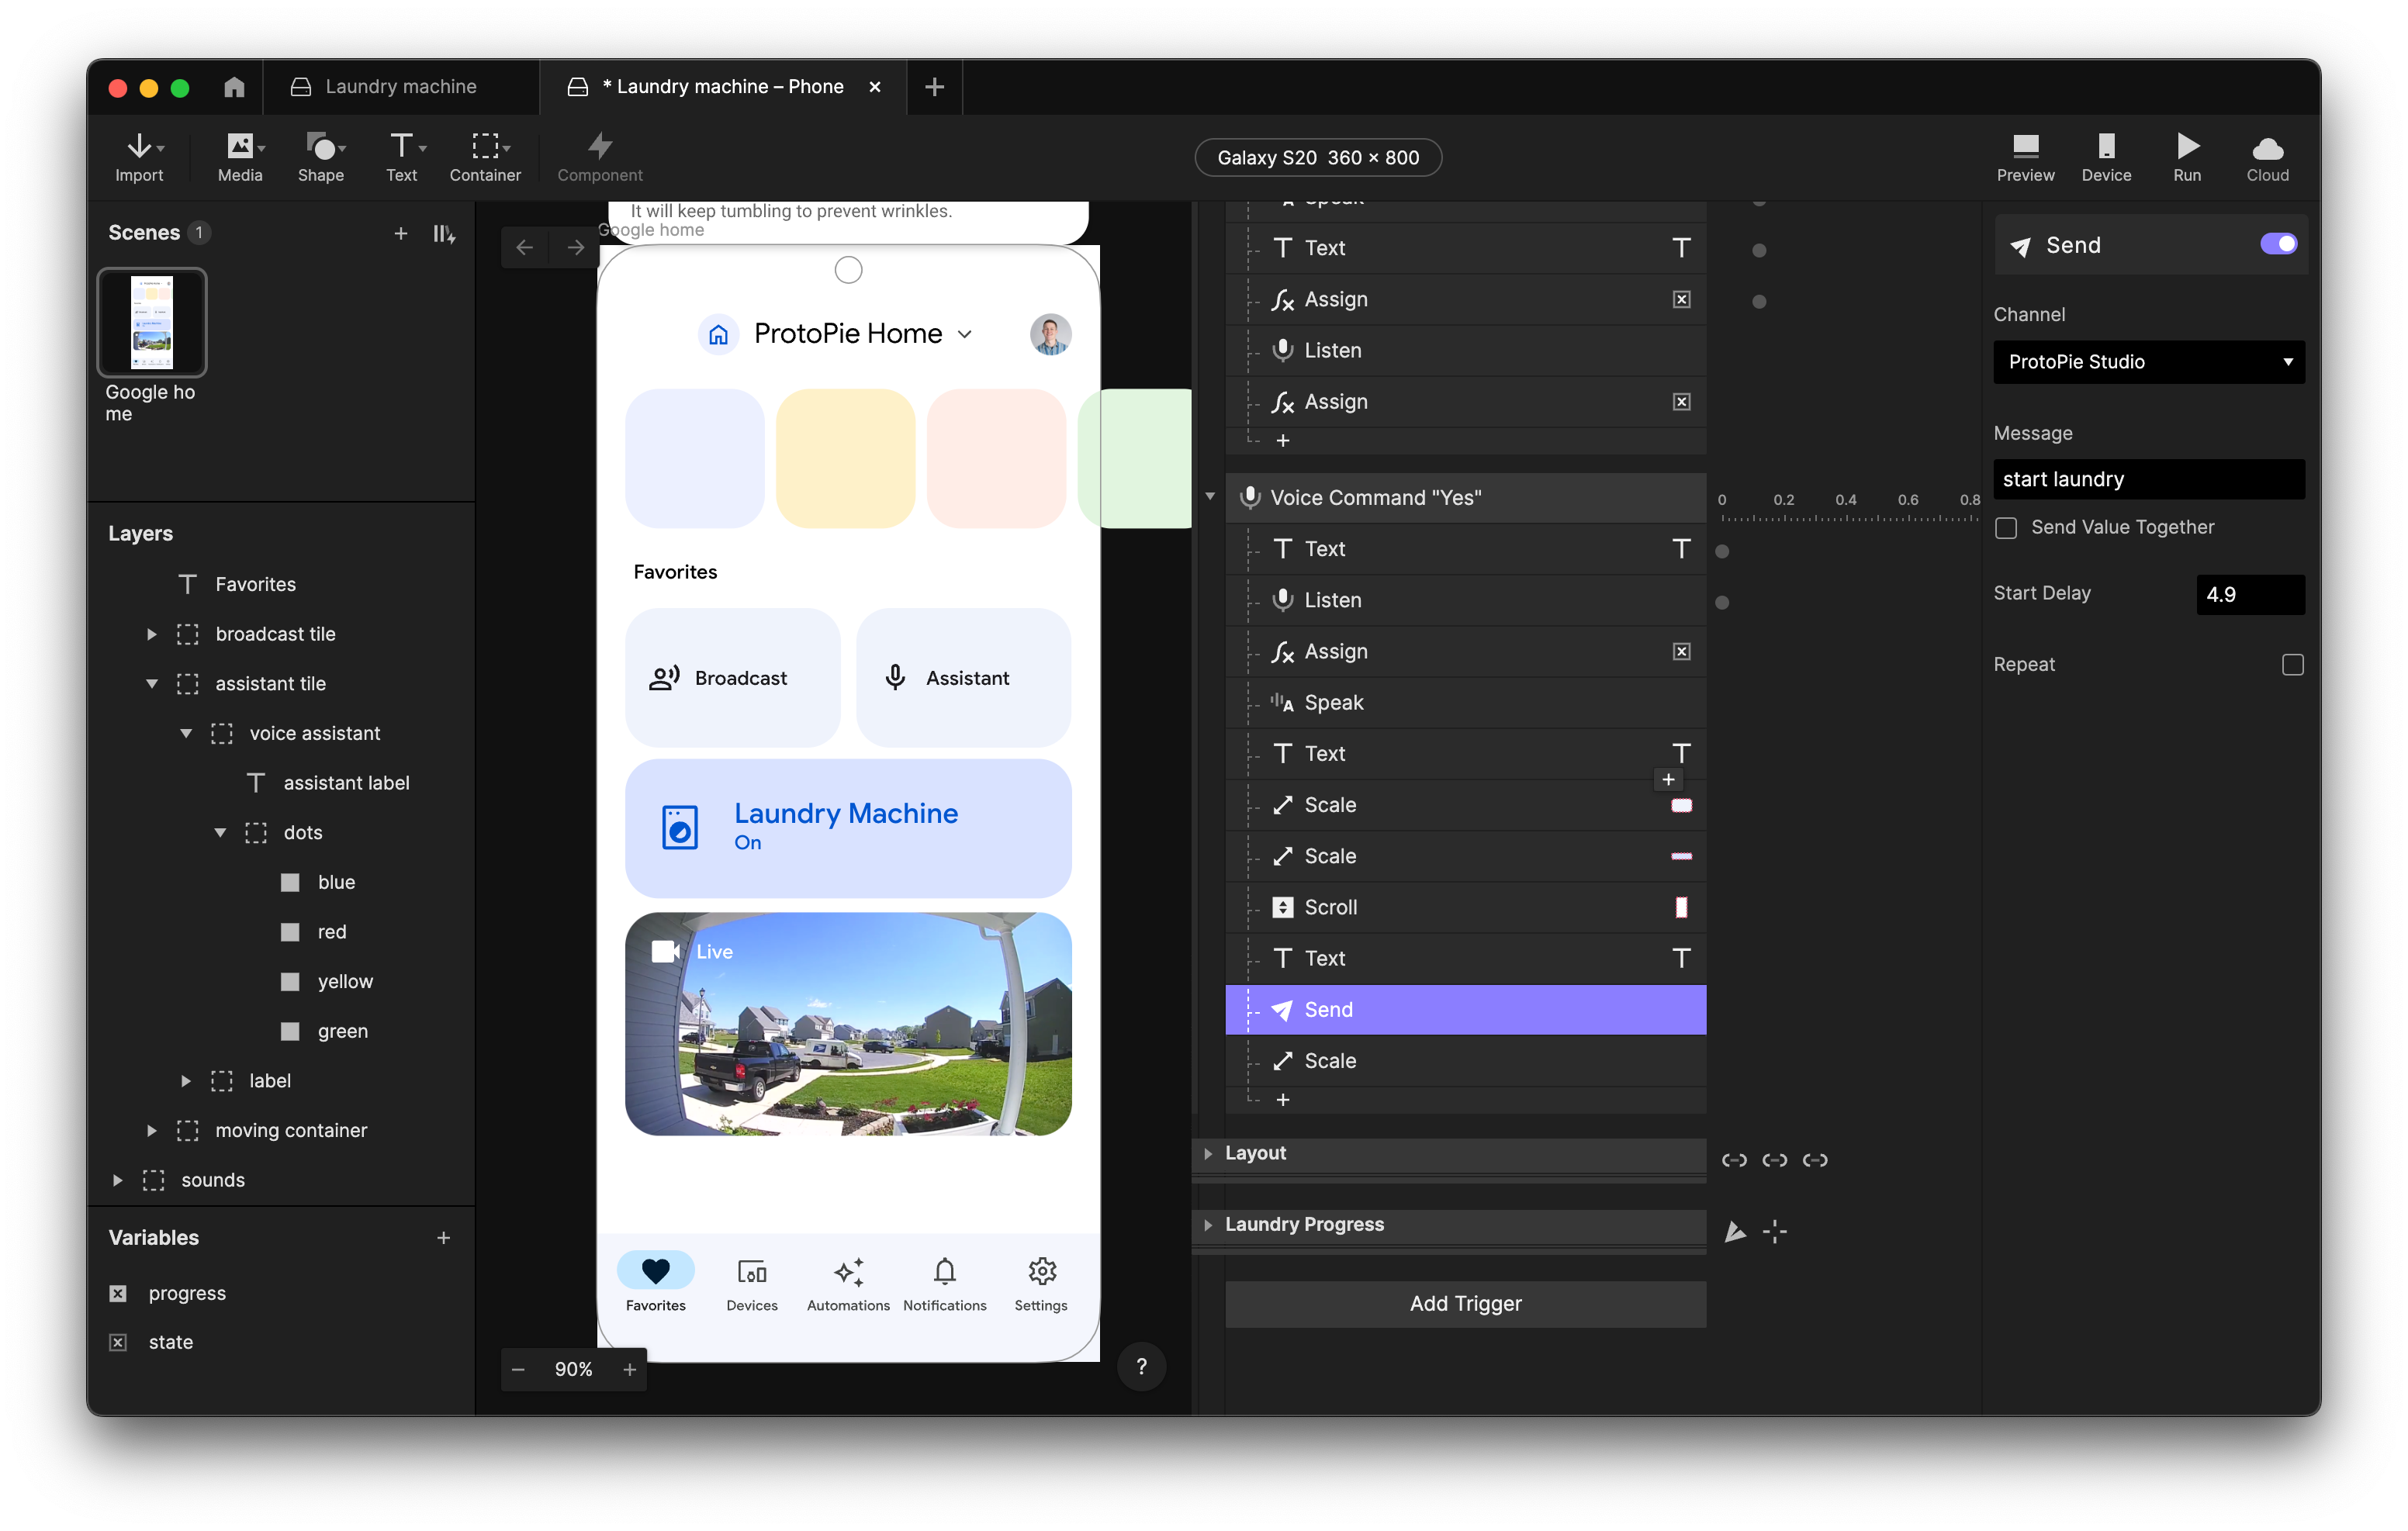
When the user responds with “Yes”, the prototype will stop listening, resize the tile, and send the message “start laundry” to ProtoPie Connect.
8. Receive a message with a receive trigger
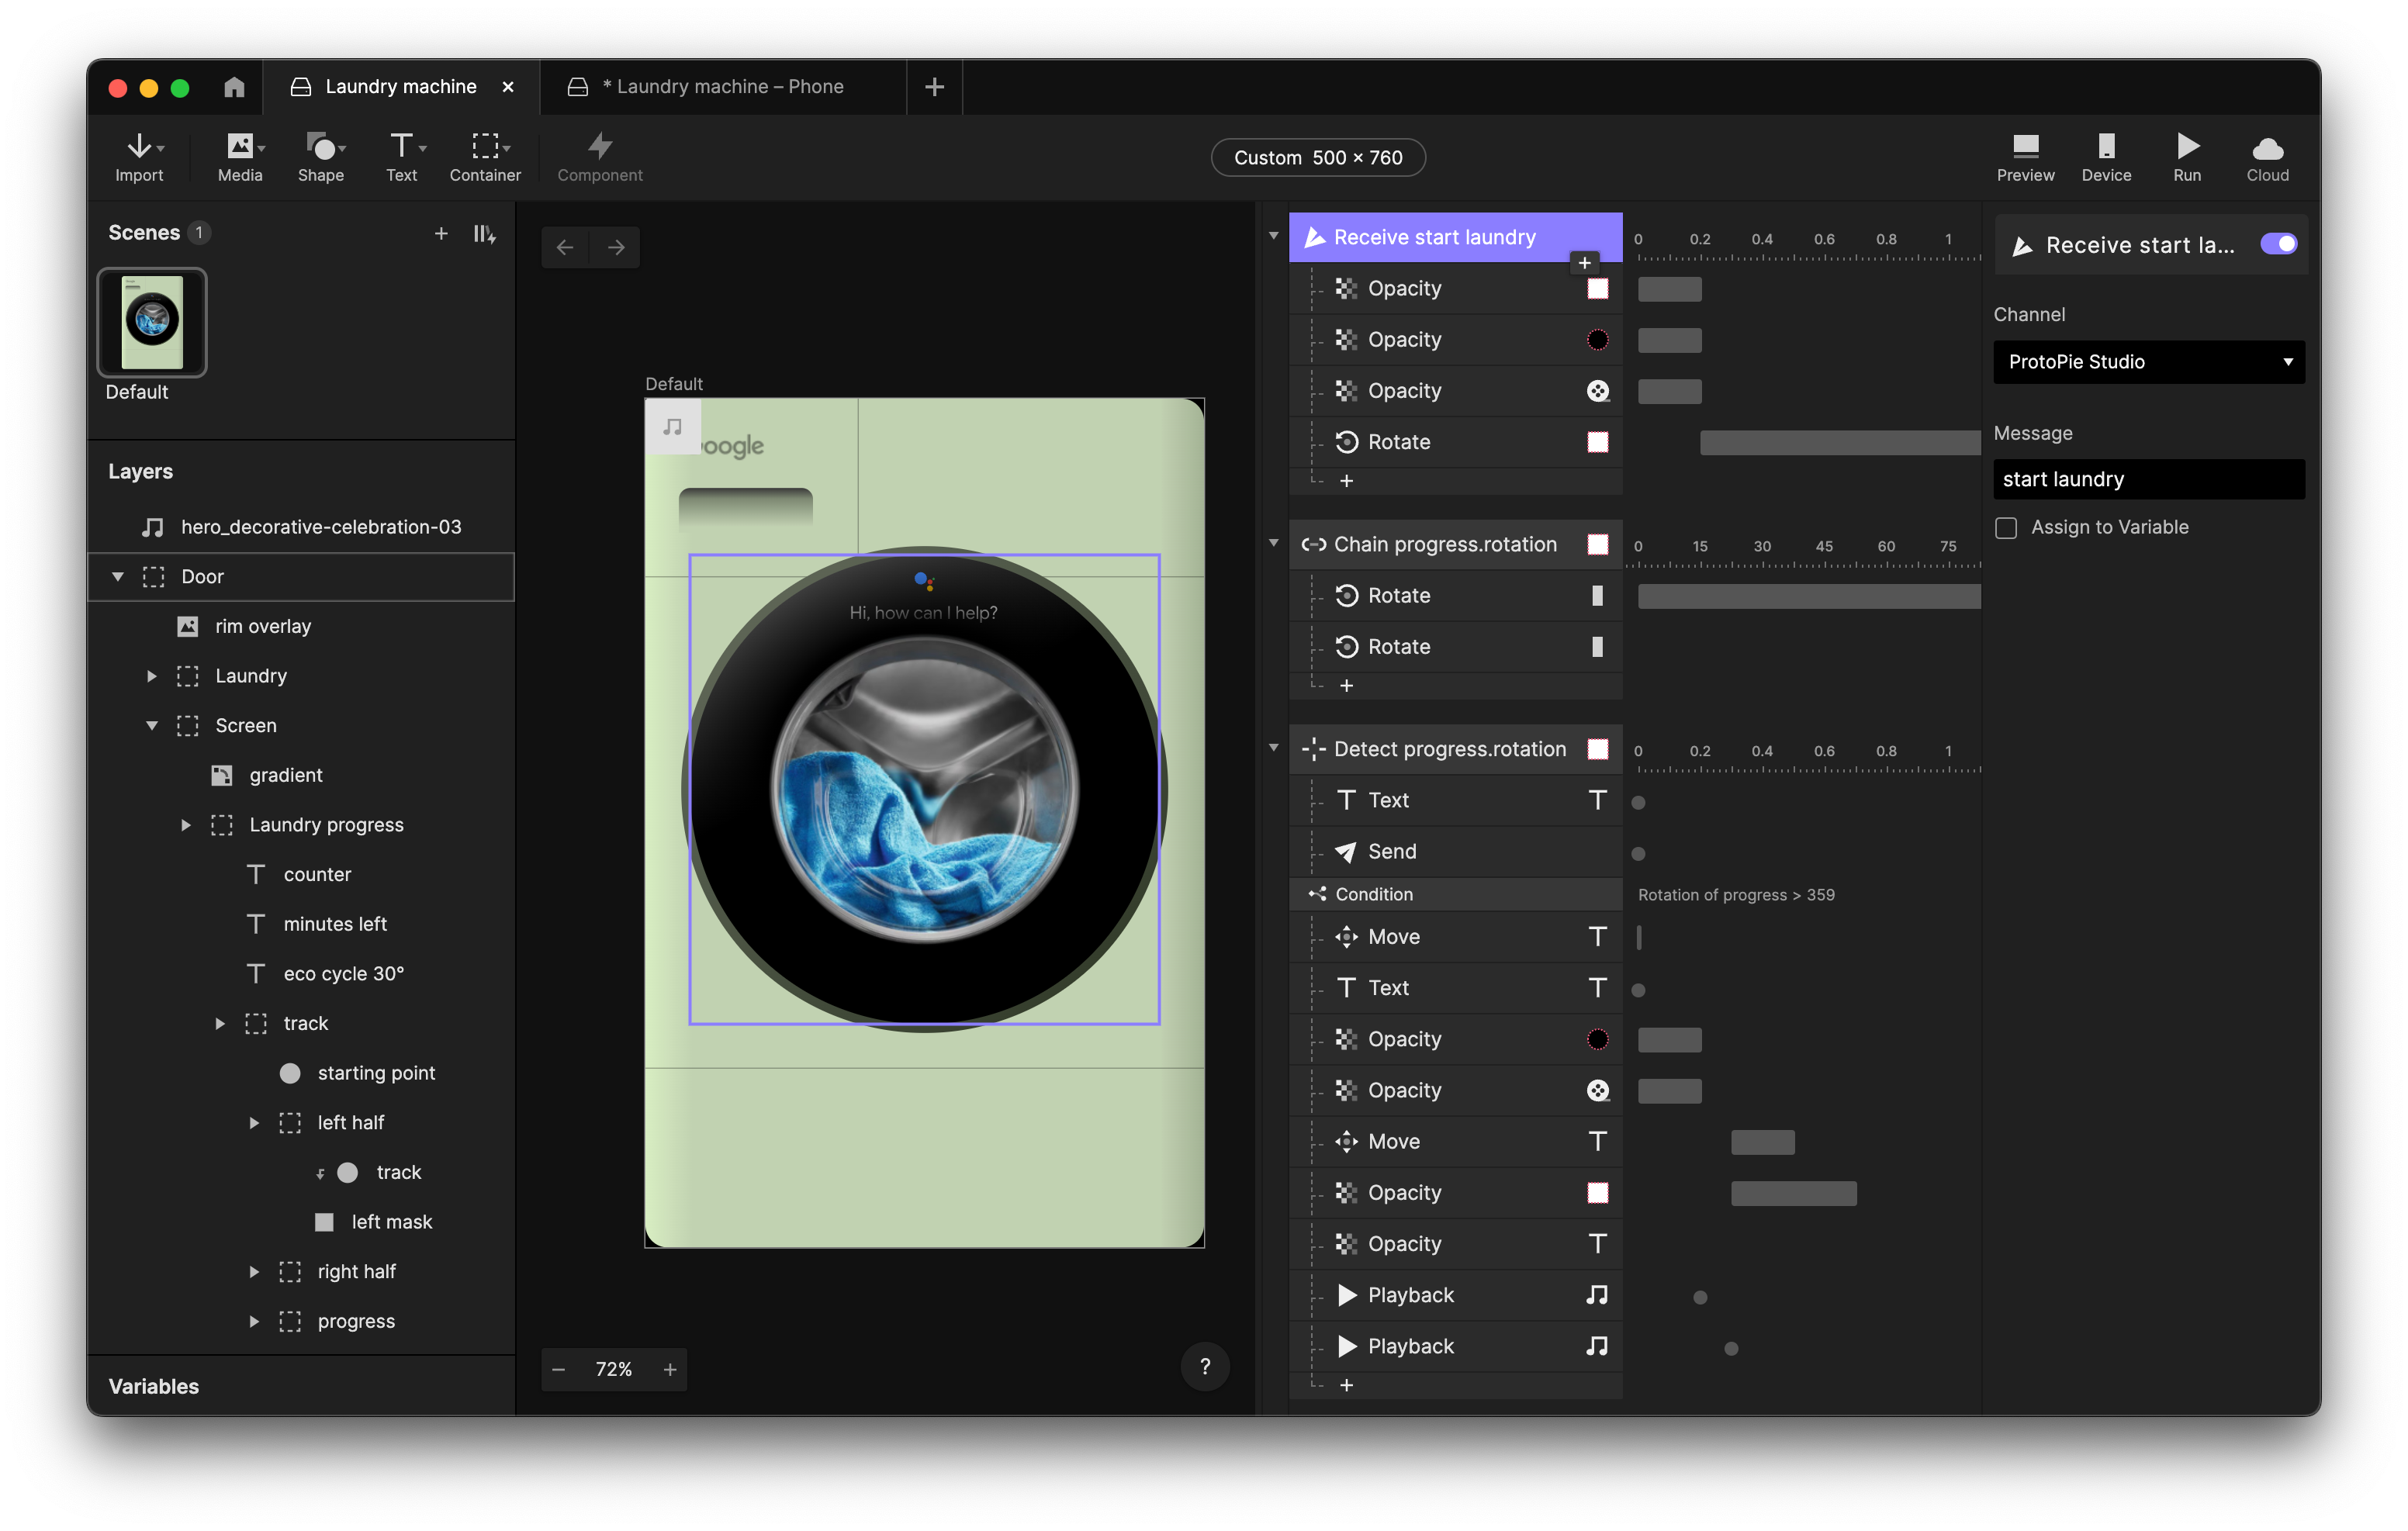
In our laundry machine Pie, we can use a Receive trigger for the “start laundry” message. This will fade out the assistant, fade in the progress bar, and start the rotation of the progress bar.
For a circular progress bar to work in ProtoPie, you need to do some clever tricks with masks, which you can see in the Chain trigger.
We can use Detect to trigger when the progress bar is rotating. It will update the text of the timer with 75 - round(progress.rotation / 360 * 75) and send “laundry progress” with value progress.rotation / 360 to ProtoPie Connect. This variable from 0 to 1 can be used to show the progress in the app.
Finally, with a Condition we can check if the rotation of progress is bigger than 359, meaning it has done a full rotation. If that is true, we fade in the assistant and play a simple celebration sound.
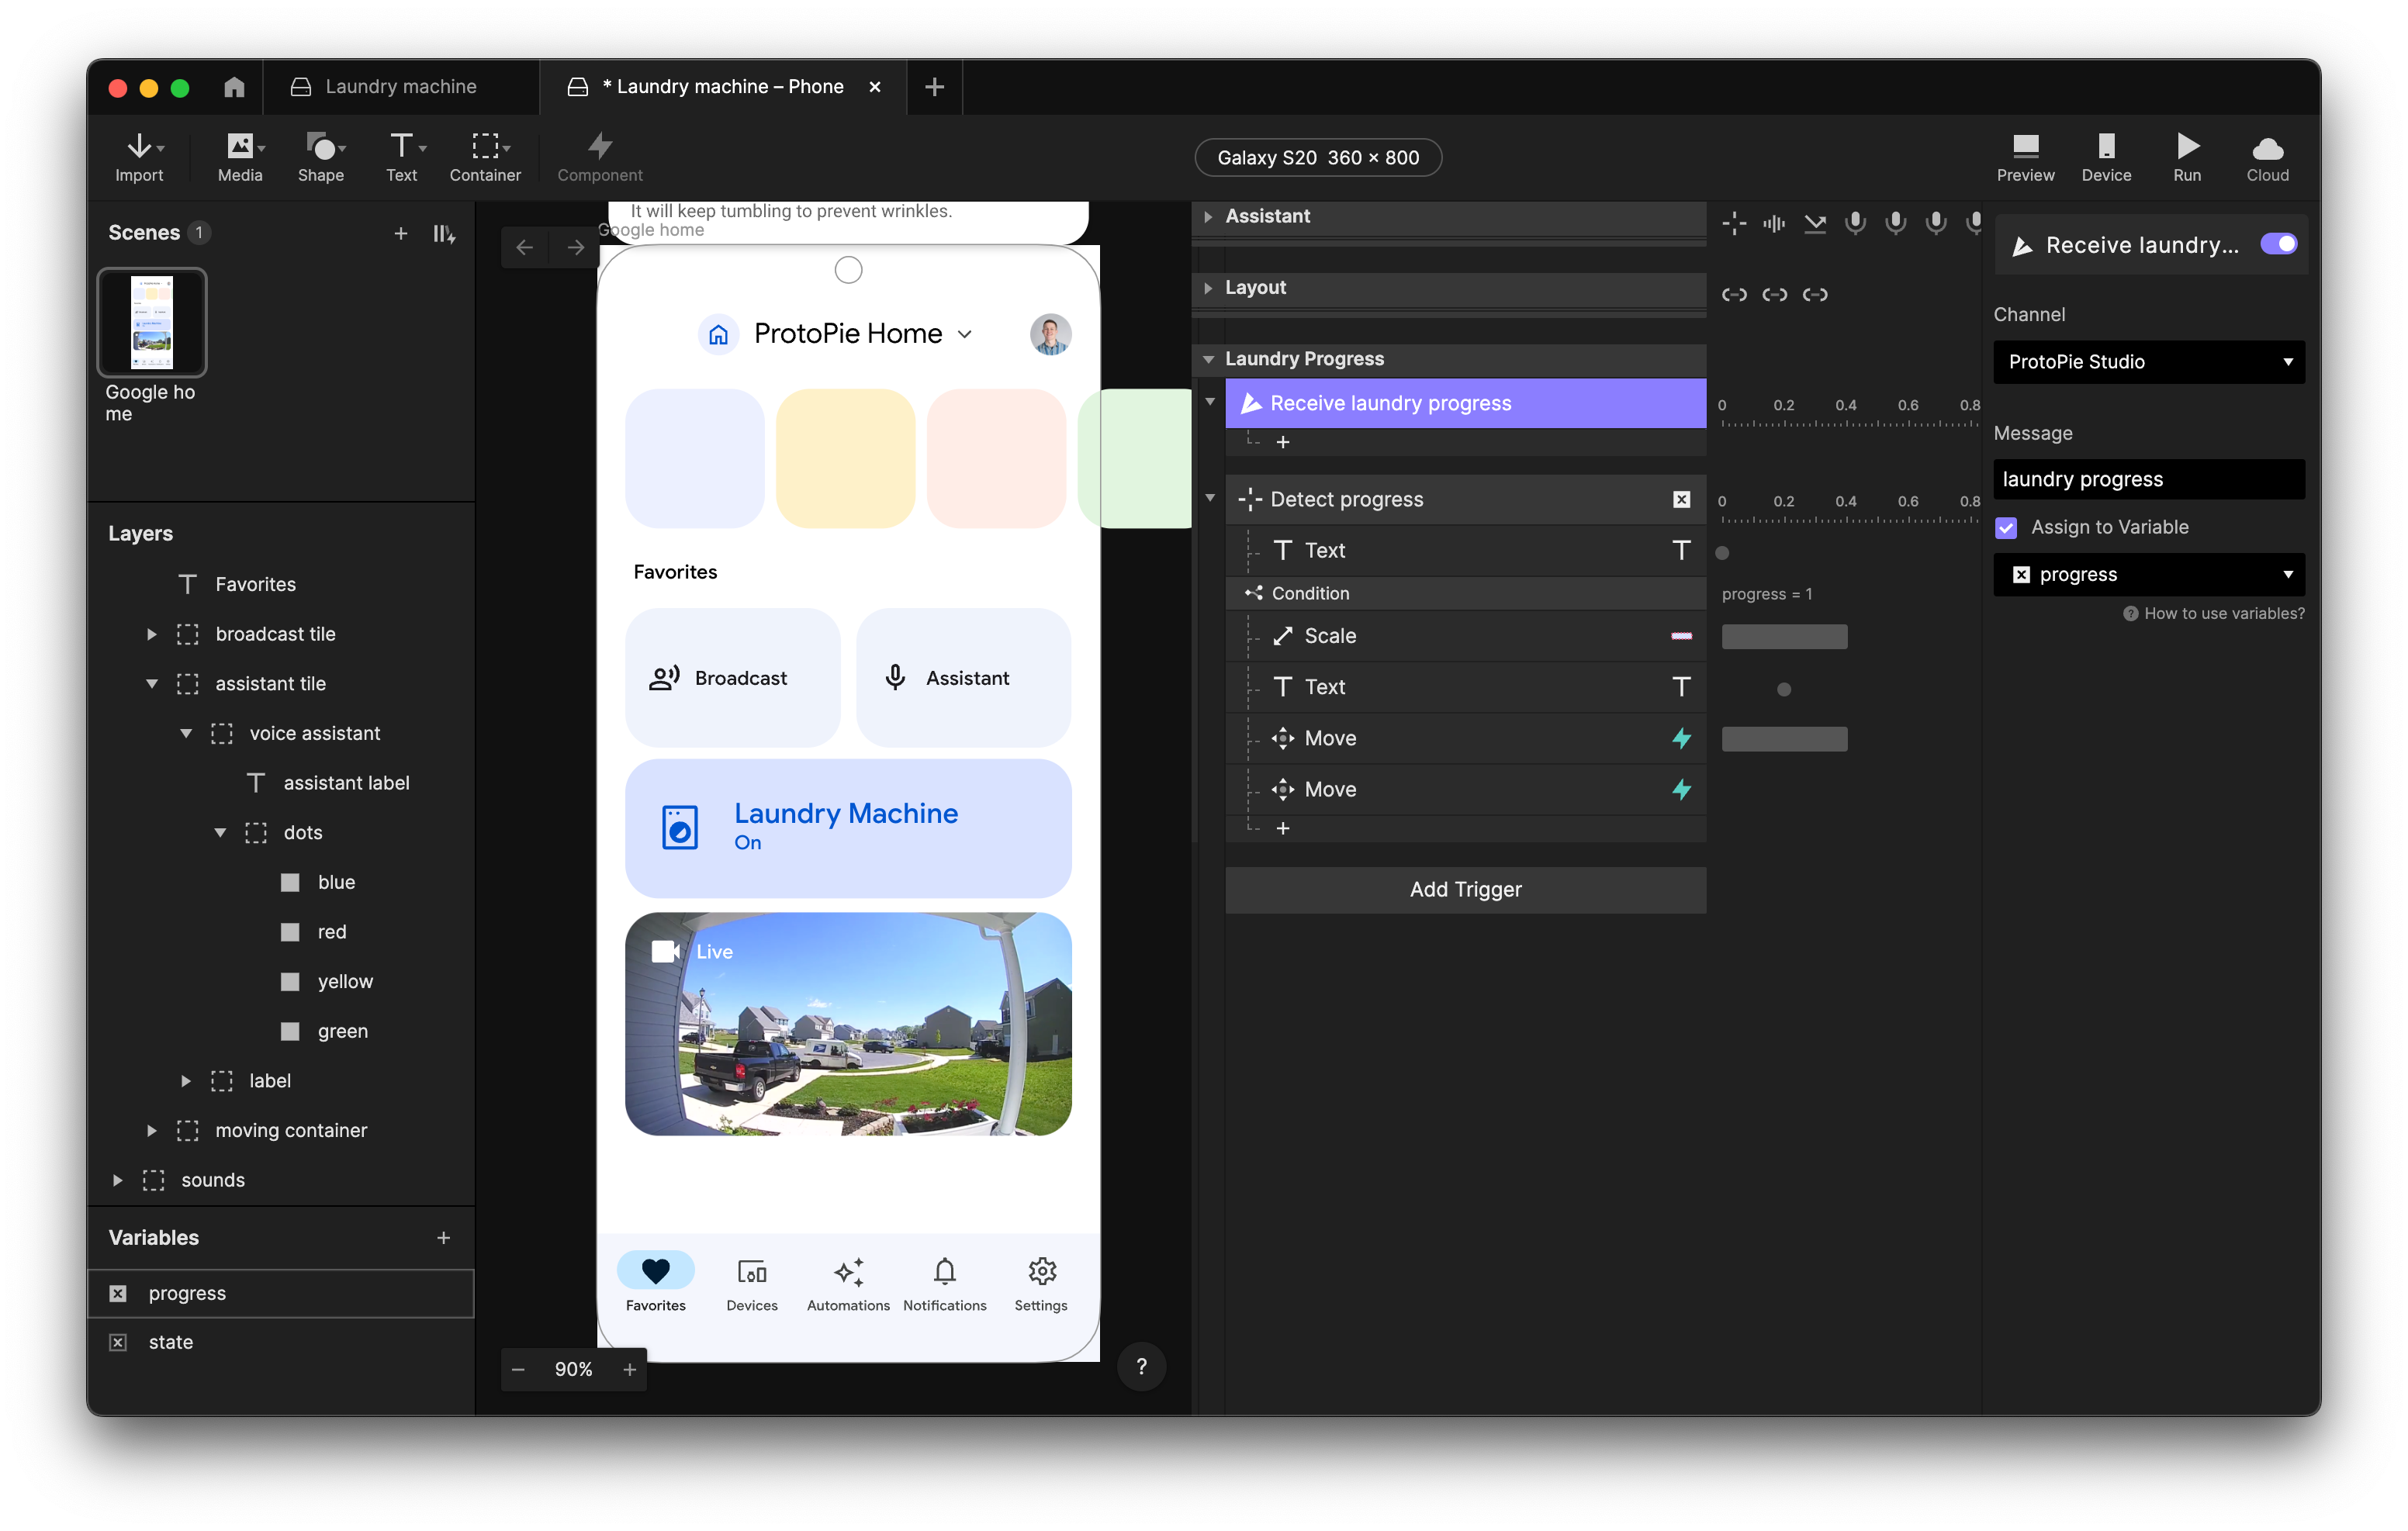
In our app, we can use a Receive trigger on ProtoPie Studio for “laundry progress” and assign that to a variable called “progress”.
We can then use a Text response to update the time remaining 75 - round(progress * 75) + " minutes left" in the Laundry Machine tile.
That’s it! 🥧
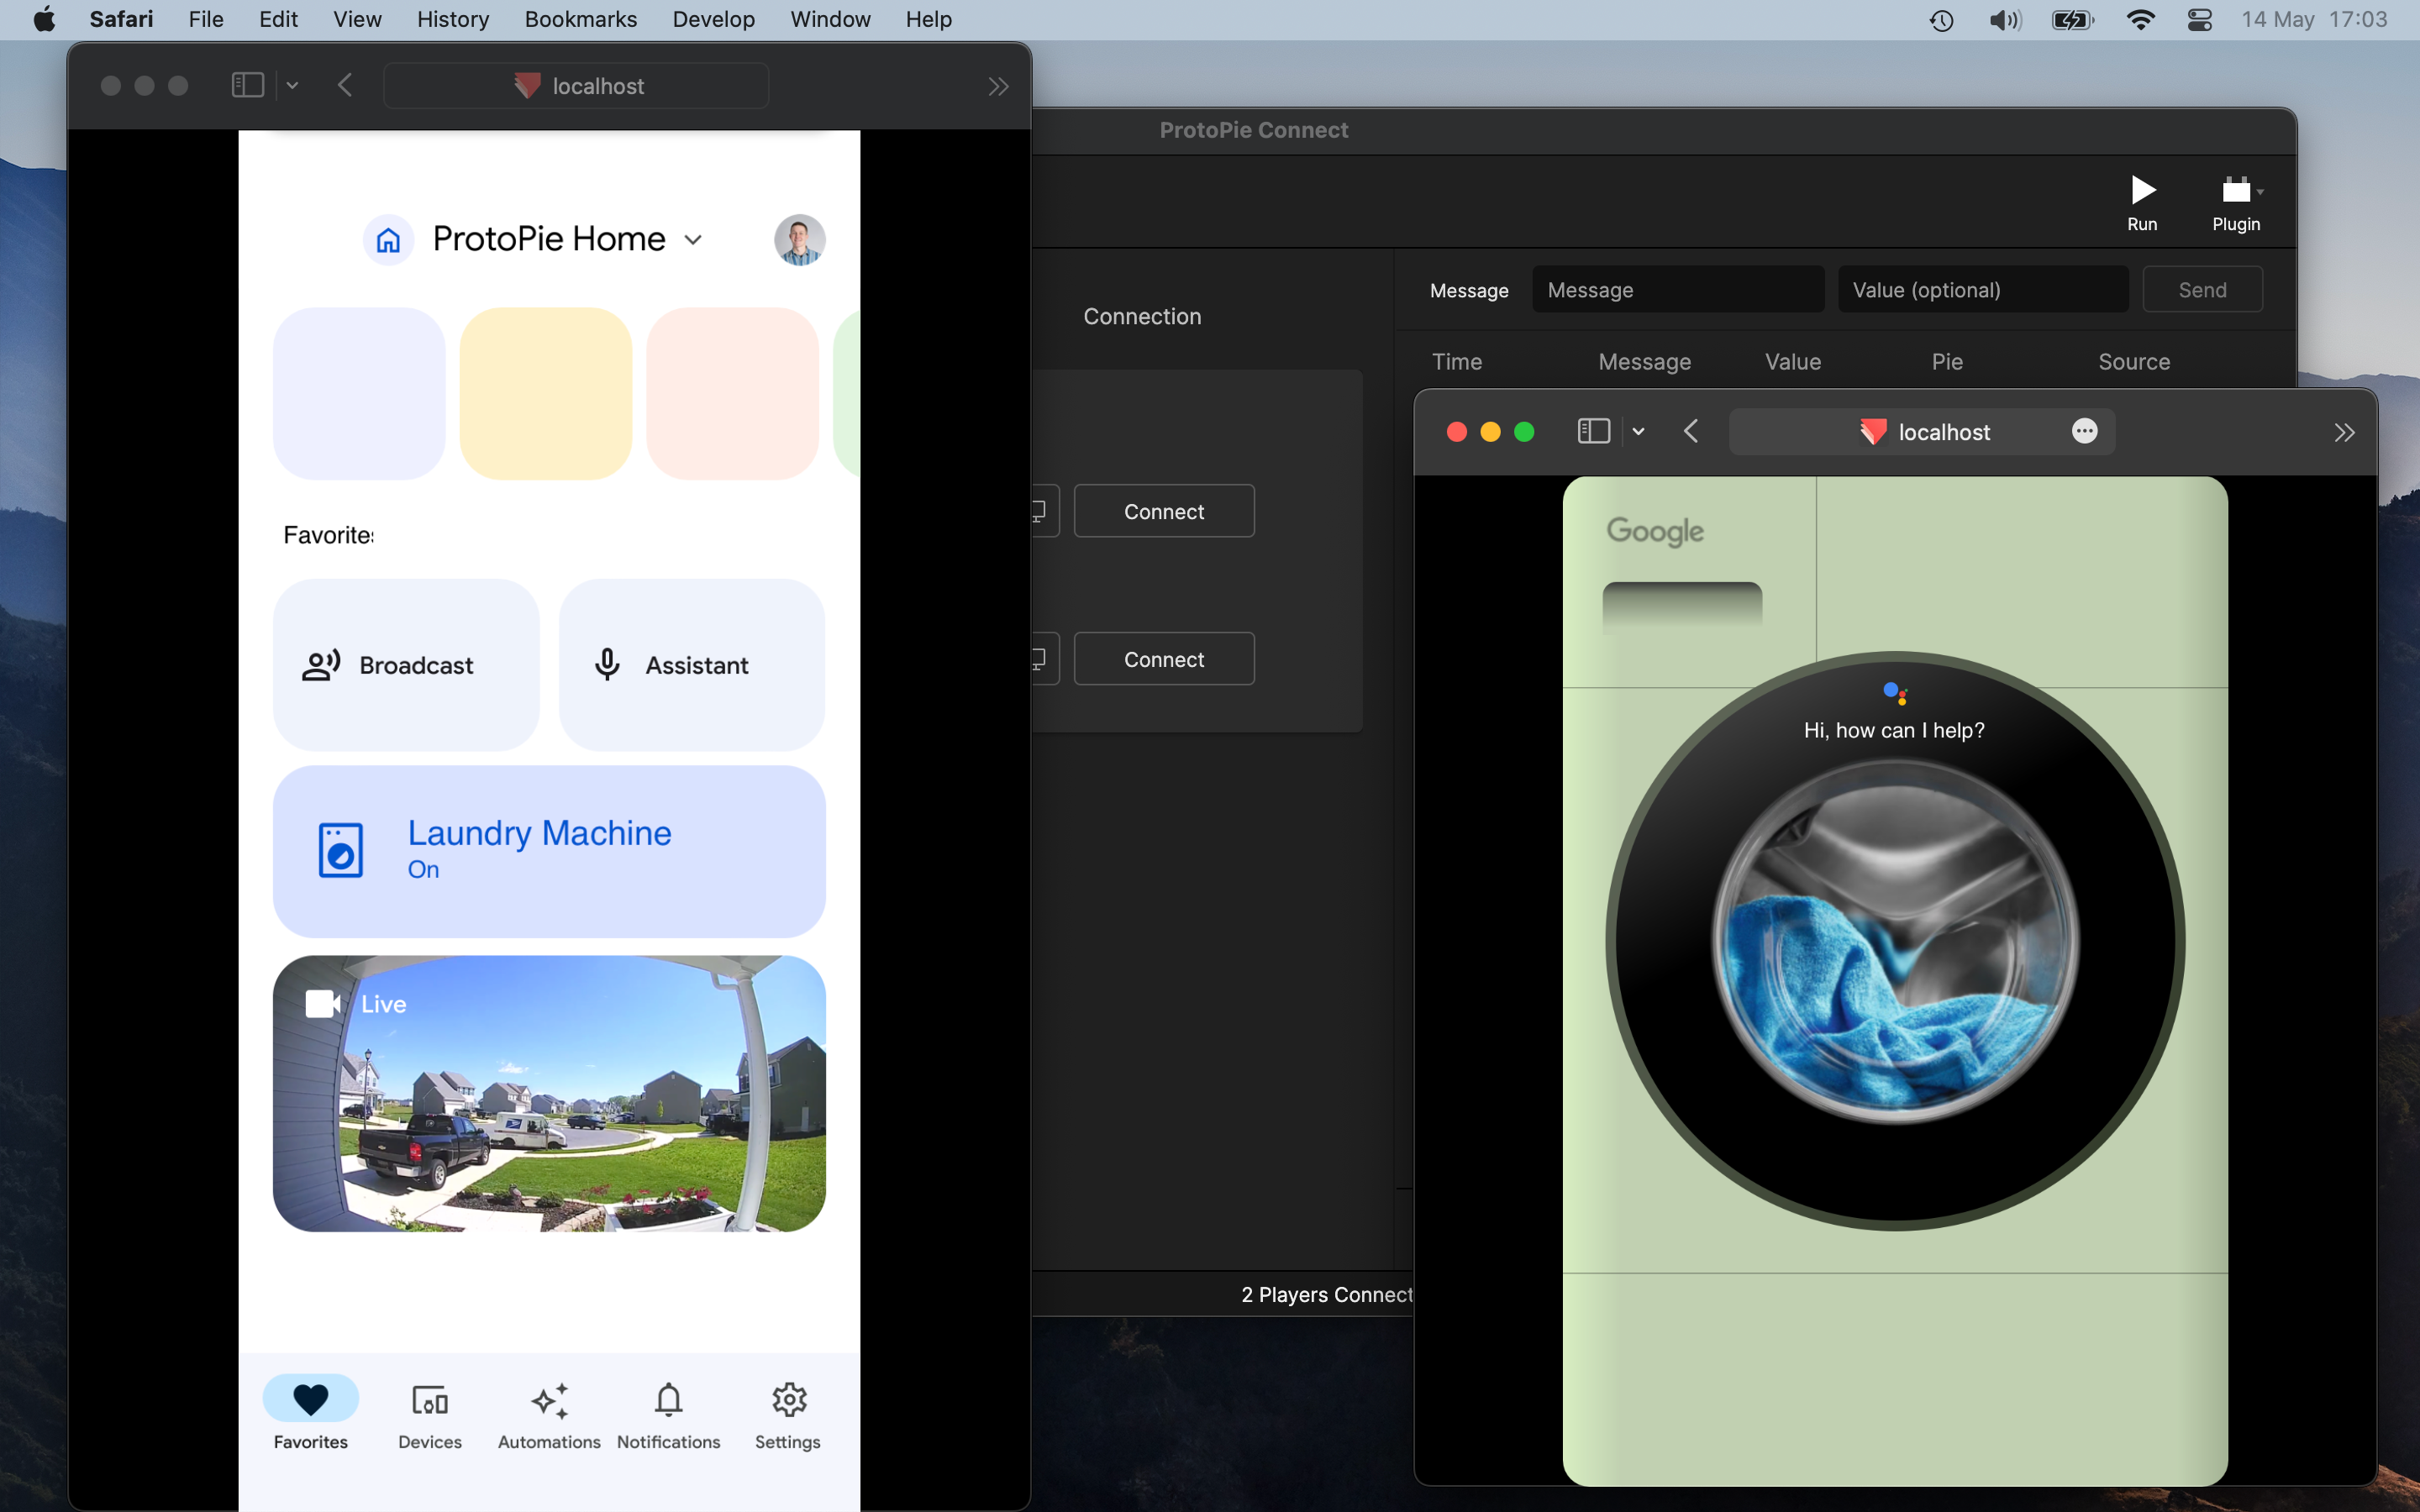
Open the Pies from ProtoPie Connect and see how your prototypes come to life, and of course, you can play them on your phone, tablet, or even smartwatch!
Create your own voice and cross-device prototypes
In this tutorial, we just went over a bunch of different ProtoPie and ProtoPie Connect functionalities to create an immersive prototyping experience that can be used to explore, iterate and validate our designs.
Why don't you give it a try yourself? Get started and try ProtoPie for free!
If you want to learn more about voice prototyping, check out this free masterclass on voice assistant prototyping!
Happy prototyping!
-Voice.jpg)
