How to Prototype a Touchscreen Kiosk
Learn more about touchscreen interactions and how to prototype your own interactive kiosk.

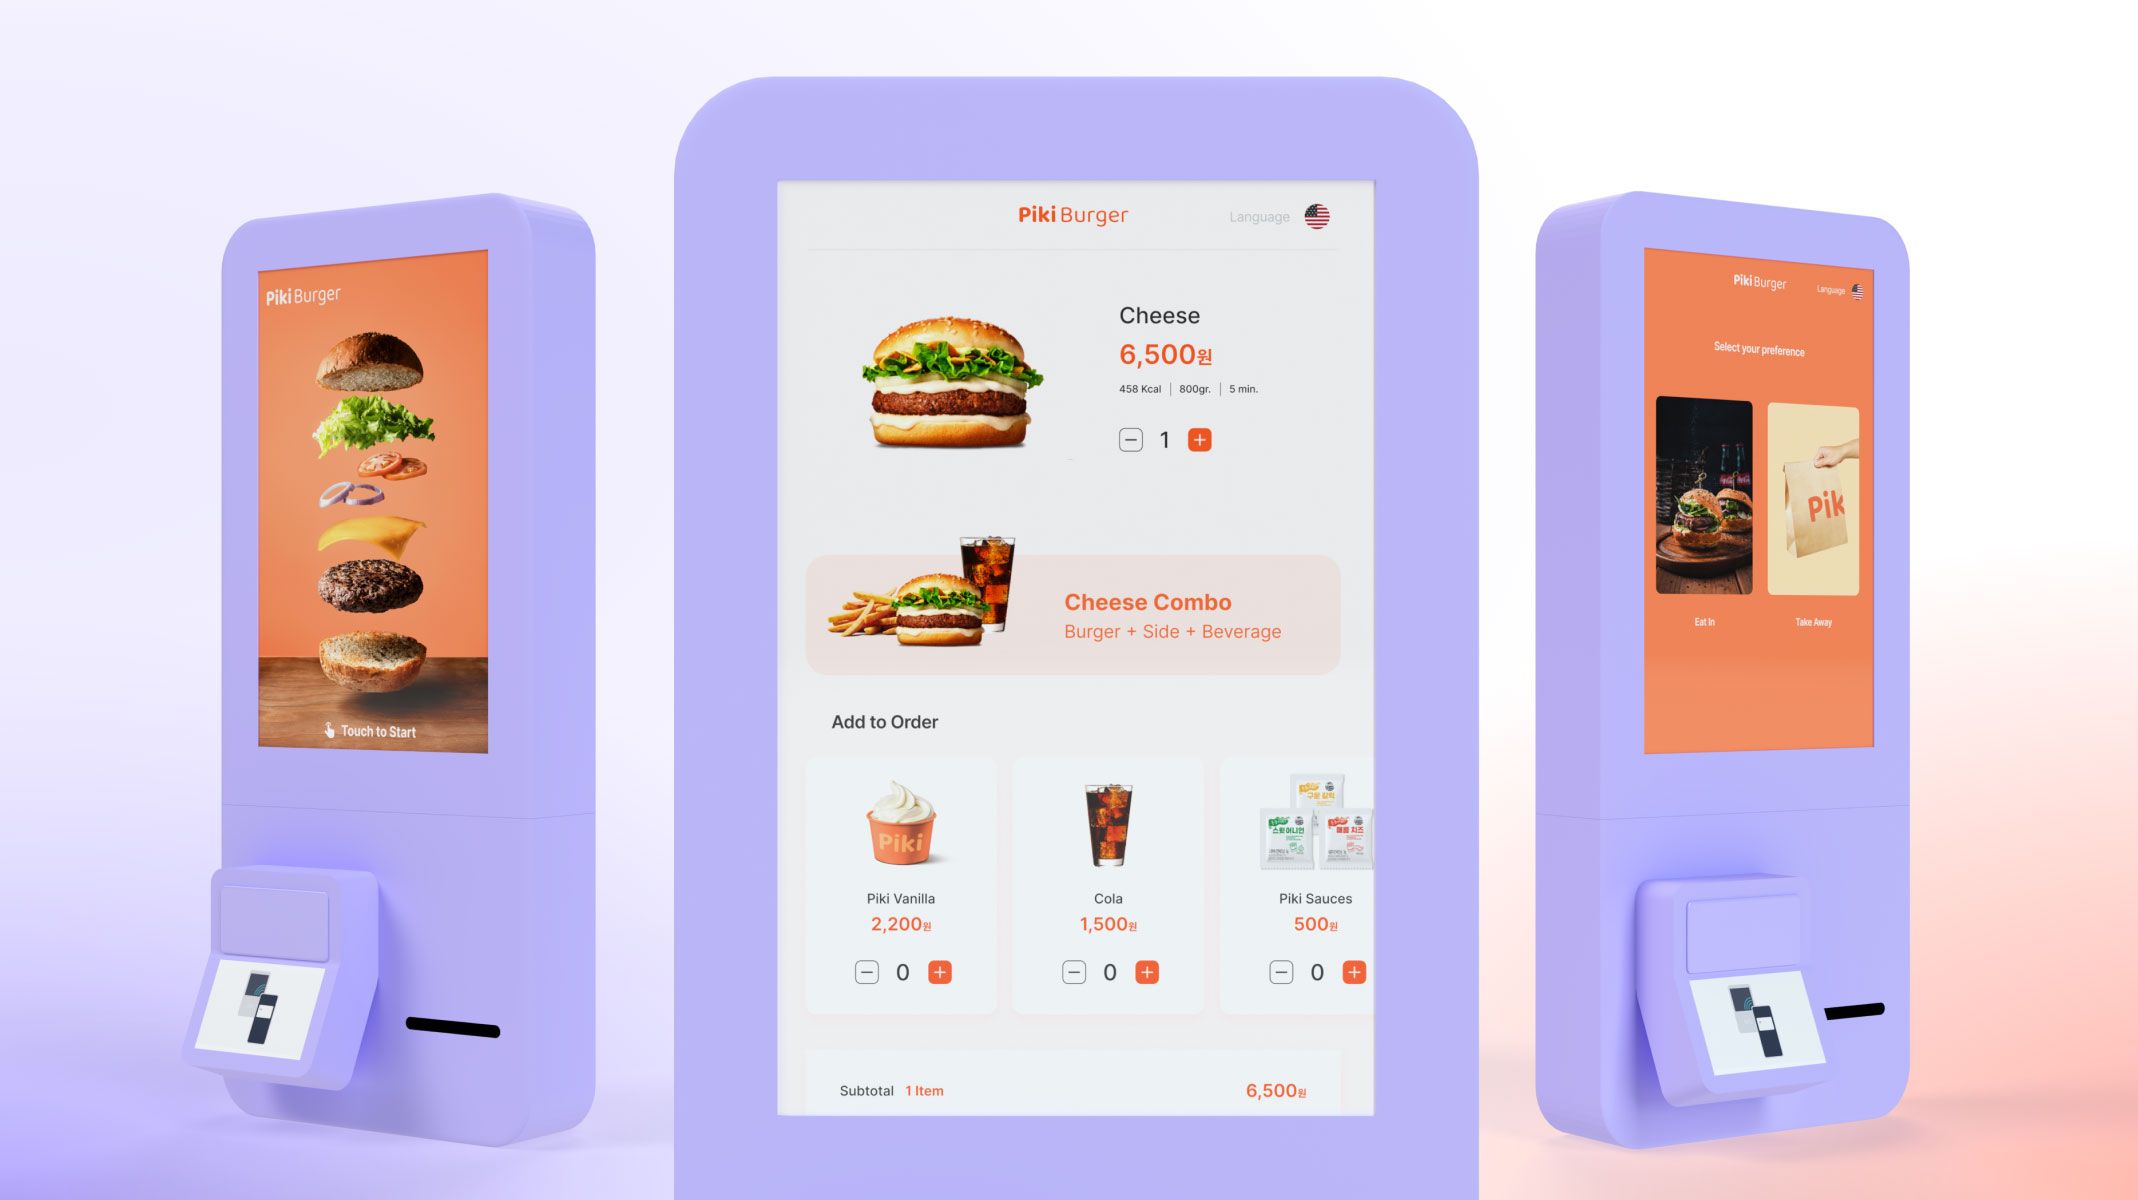.jpg)
Unleash the power of touchscreen prototyping to communicate your design ideas effectively to developers and management.
This tutorial will walk you through creating a fully functioning self-serve kiosk prototype, using touchscreen interactions to captivate your audience. Check out the demo below to see the full prototype in action.
To fully recreate this prototype and enable communication among multiple devices, you’ll need access to ProtoPie Connect on the Pro or Enterprise plan.
Ready? Let's get started!
TL;DR
Step 1: Exporting designs from Figma to ProtoPie
Step 2: Creating the touchscreen interactions
Step 3: Prototype the payment process
Step 4: Create interaction recordings for an easy handoff
Step 1: Exporting designs from Figma to ProtoPie
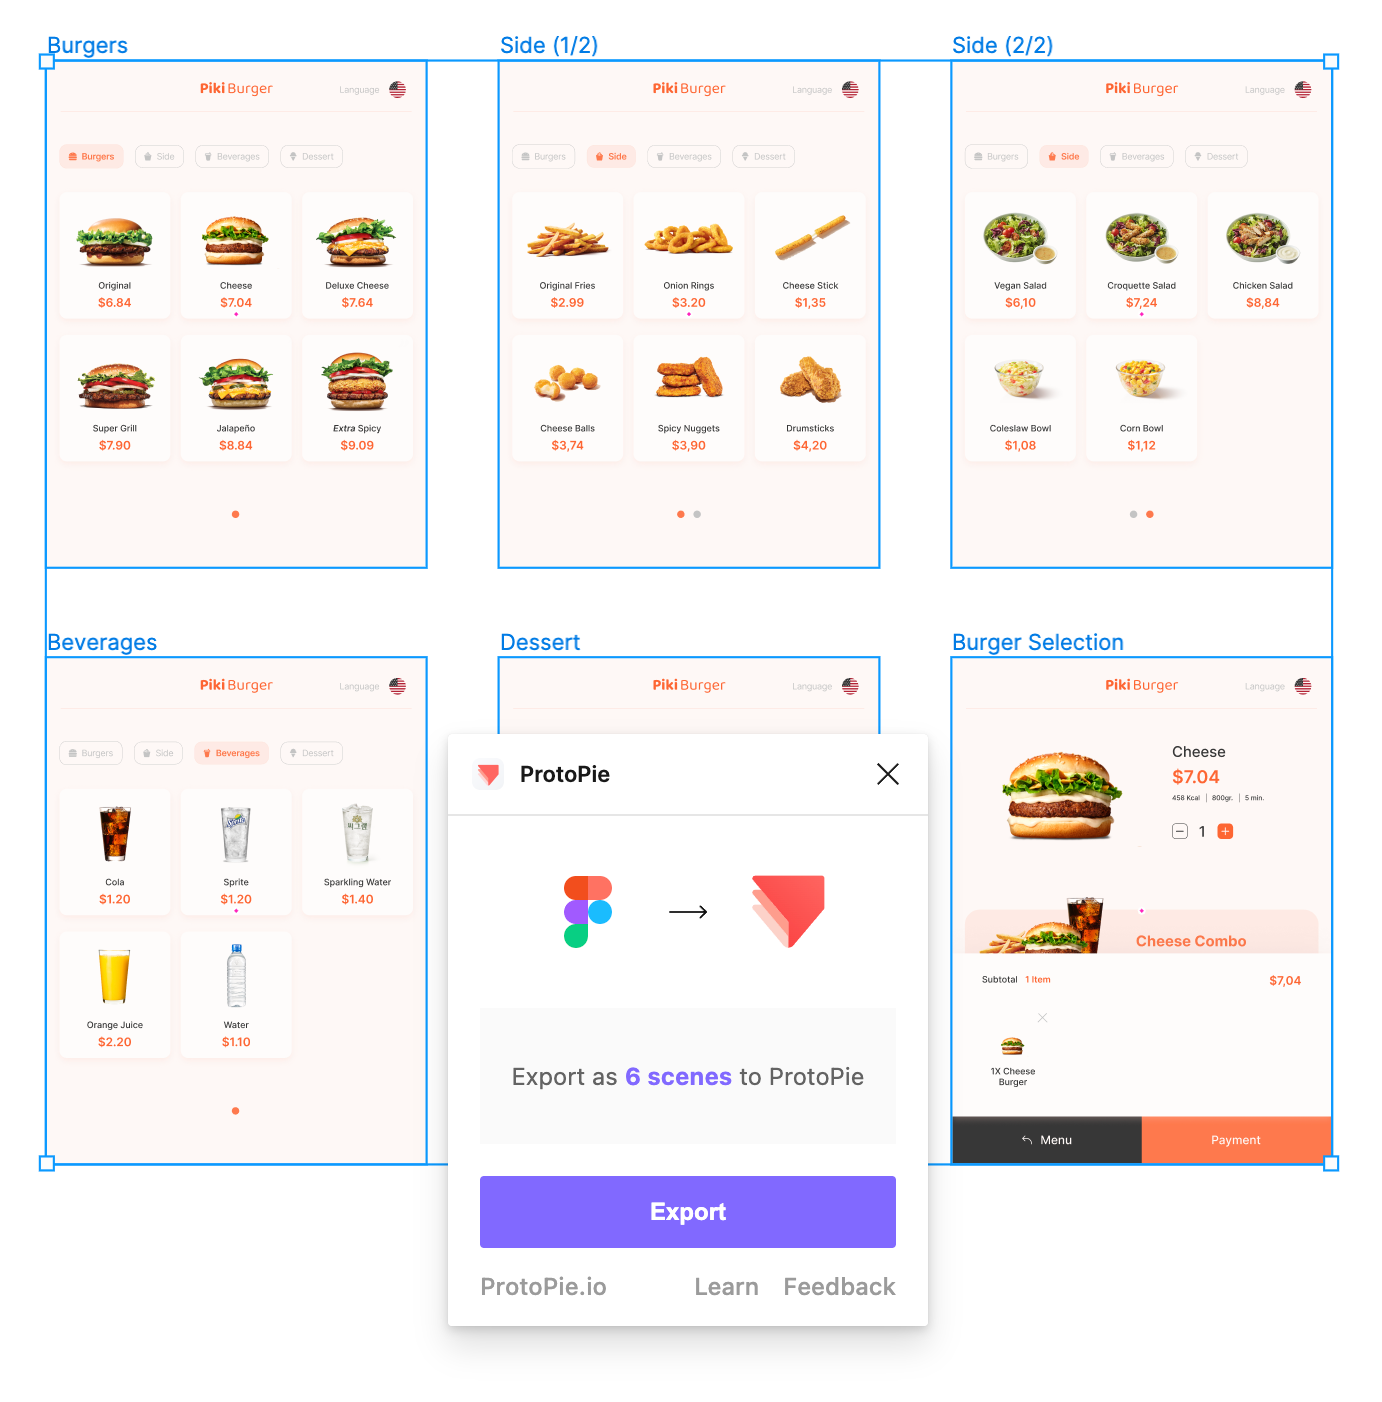.png)
First things first, we created all of the UI in Figma and exported it to ProtoPie Studio using the ProtoPie plugin for Figma. This plugin makes it super easy to transform your Figma designs into interactive prototypes.
Learn more about the differences between ProtoPie vs Figma, and how you can use each tool for advanced prototyping.
If you want to recreate the prototype, you can take a look at the finished Pie files below.
Step 2: Creating the touchscreen interactions
This prototype combines very simple interactions, but when they are combined, the result is highly realistic.
ProtoPie supports various gesture interactions, such as pull, drag, pinch, and more, all of which are touchscreen interactions that transform your prototypes into high-fidelity masterpieces.
In our kiosk prototype, we implemented the interaction of switching options by lightly swiping the screen.
For this, we used mostly Chain triggers combined with Scale and Opacity responses to highlight the selected side and beverage.
💡 Fun fact: In case you’re worried about security, this prototype is a self-contained solution and can run completely offline, so there’s no need for a network connection.
We used ProtoPie Connect to achieve our goal of making this prototype indistinguishable from a real product. ProtoPie Connect can bridge the gap between prototypes and any hardware, API, or app.
As you can see on the laptop screen, when each item is selected, the information is shared to ProtoPie Connect, which is where the information can be used across multiple devices
Learn how to use ProtoPie Connect in this free online course.
Step 3: Prototyping the payment process
Microinteractions and other animations are also easily doable. As you can see in the videos, we created a simple receipt animation to simulate the payment process, using a Start trigger with a Scale response, and a Detect trigger with Move and Rotate responses.
On a mobile device, you can easily simulate the fingerprint recognition effect with a long-press gesture.
Long Press is also one of the gesture triggers supported by ProtoPie and has a wide range of applications in modern touchscreen design.
Step 4: Create interaction recordings for an easy handoff
If you work with a team, you can share your Pie using ProtoPie Cloud and record the interactions for a smooth handoff to the development team free of any guesswork.
Learn more about the handoff feature and how you can use it to efficiently communicate your design ideas.
That’s it!
Great job! We hope you now have the know-how to create your own kiosk prototypes using touchscreen prototyping.
If you need more help working with ProtoPie Connect, then don’t miss out on this free ProtoPie Connect course featuring our ProtoPie Guru Jeff.
Create interactive touchscreen prototypes with ProtoPie
ProtoPie is the perfect tool for crafting interactive touchscreen prototypes, making it easy to showcase your design ideas effectively. Get started for free and create your own touchscreen interactions.
Share your creations with us by tagging #MadeWithProtoPie - we can't wait to see what you come up with. Happy prototyping!
.jpg)
.jpg)